
Smarter Enhanced Opening Balances Guide with Historical Transactions - GB
Introduction
The following details the steps required to ensure you get the best experience out of our Smarter Opening Balances app.
Closing balances from previous systems become opening balances in Business Central.
Before starting, please make sure you have the following information ready to input or import:
- Opening Trial Balance – Closing Trial Balance from Legacy System
- Open and Historical customer invoices and credit memos (Receivables/Debtors)
- Open and Historical vendor invoices and credit memos (Payables/Creditors)
- Bank account balance (Bank) and Historical Transactions
- Open Inventory Quantity and Costs (Inventory)
- Open VAT Return (VAT)
- Fixed Assets Opening Balance (Fixed Assets)
- General Ledger Historical Transactions
Customers, vendors, Bank, Inventory, VAT and Fixed Assets have their own subledger as well as the total represented by their respective GL (nominal) accounts.
When these subledger transactions are posted, they will impact their respective control accounts.
Excel Template
There is an excel spreadsheet that accompanies this guide.
01-Trial Balance
Extract Trial Balance at closing balance date from existing system.

No: BC GL account. Smarter Opening Balance app will automatically populate the No from Chart of Accounts. Copy values from Edit in Excel spreadsheet and paste into this spreadsheet.
Name: BC GL Name. Smarter Opening Balance app will automatically populate the description from Chart of Accounts. Copy values from Edit in Excel spreadsheet and paste into this spreadsheet.
Debit: This is debit amount from legacy trial balance
Credit: This is credit amount from legacy trial balance
(Note: if Legacy trial balance only show 1 column for debit and credits, then fill in column F – OB Amount. Credit amount will be a minus (-) figure)
OB Amount Formula: Where Debit and Credit amount columns are filled in , OB Amount Formula will fill in a single figure here.
OB Amount: Copy and paste special from OB Amount formula or from legacy TB.
02-Customer OB
The following columns are shown in excel template worksheet.

This worksheet is for any outstanding invoices or credit notes with customers (debtors). Insert minus (-) sign for credit memos amount.
Customer Code: Business Central customer reference number code.
Document Type: This is a drop down list
Document No: This is a free text field up to a maximum of 20 characters. This can be user defined or from previous systems.
Posting Date: Transaction date posted in previous system.
Ext Document No: This is a free text field up to a maximum of 30 characters. This can be user defined or from previous systems. This is optional
Description: This is a free text field up to a maximum of 80 characters. This can be user defined or from previous systems.
Currency Code: Select from drop down list for foreign currency. For local currency (example GBP), leave blank. If relevant currency codes are not found on this list, please reach out to your Microsoft Partner for further assistance.
Amount: This is the amount for the transaction in currency selected above.
Amount LCY: This is the amount in local currency. Where Amount column is in foreign currency, then fill in the local currency equivalent amount. Otherwise, where Amount column is in local currency, then fill in with the same amount.
Global Dimension 1: This is optional and to be filled in accordingly if Global Dimension 1 is setup and defined with Dimension values
Global Dimension 2: This is optional and to be filled in accordingly if Global Dimension 2 is setup and defined with Dimension values
Shortcut Dimensions: These are optional and to be filled in accordingly if Shortcut Dimension(s) are setup and defined with Dimension values. Add in more Shortcut Dimensions columns if there are more than what has been provided on spreadsheet.
03-Vendor OB
The following columns are shown in excel template worksheet.

This worksheet is for any outstanding invoices or credit notes with suppliers (creditors). Insert minus (-) sign for invoice amount.
Vendor Code: Business Central vendor reference number code.
Document Type: This is a drop down list
Document No: This is a free text field up to a maximum of 20 characters. This can be user defined or from previous systems.
Posting Date: Transaction date posted in previous system.
Ext Document No: This is a free text field up to a maximum of 30 characters. This can be user defined or from previous systems.
Description: This is a free text field up to a maximum of 80 characters. This can be user defined or from previous systems.
Currency Code: Select from drop down list for foreign currency. For local currency (example GBP), leave blank. If relevant currency codes are not found on this list, please reach out to your Microsoft Partner for further assistance.
Amount: This is the amount for the transaction in currency selected above.
Amount LCY: This is the amount in local currency. Where Amount column is in foreign currency, then fill in the local currency equivalent amount. Otherwise, where Amount column is in local currency, then fill in with the same amount.
Global Dimension 1: This is optional and to be filled in accordingly if Global Dimension 1 is setup and defined with Dimension values
Global Dimension 2: This is optional and to be filled in accordingly if Global Dimension 2 is setup and defined with Dimension values
Shortcut Dimensions: These are optional and to be filled in accordingly if Shortcut Dimension(s) are setup and defined with Dimension values. Add in more Shortcut Dimensions columns if there are more than what has been provided on spreadsheet.
04-Item OB
The following columns are shown in excel template worksheet.

This worksheet is for inventory count as at opening balance date.
Item No: Business Central item reference number code. Smarter Opening Balance app will automatically populate the No from Item. Copy values from Edit in Excel spreadsheet and paste into this spreadsheet.
Item Description: Self explanatory. Smarter Opening Balance app will automatically populate the description from Item. Copy values from Edit in Excel spreadsheet and paste into this spreadsheet.
Unit of Measure Code: Self explanatory. Smarter Opening Balance app will automatically populate the unit of measure from Item. Copy values from Edit in Excel spreadsheet and paste into this spreadsheet.
Quantity: Item quantity at opening balance date
Unit Cost: Self Explanatory. Up to maximum of 5 decimal places.
Locations: Must be set up as Location Code in Business Central first.
Bins: Must be set up as Bin Code against Location in Business Central first.
Global Dimension 1: This is optional and to be filled in accordingly if Global Dimension 1 is setup and defined with Dimension values
Global Dimension 2: This is optional and to be filled in accordingly if Global Dimension 2 is setup and defined with Dimension values
Shortcut Dimensions: These are optional and to be filled in accordingly if Shortcut Dimension(s) are setup and defined with Dimension values. Add in more Shortcut Dimensions columns if there are more than what has been provided on spreadsheet.
05-Bank OB
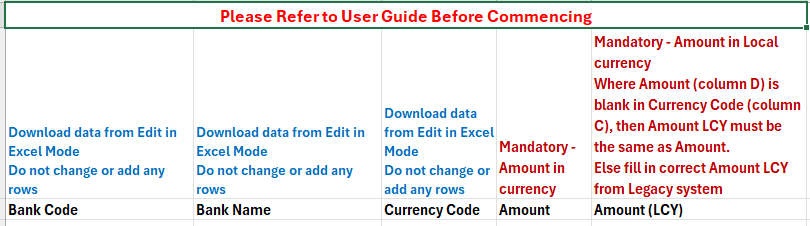
Bank Code: Business Central bank reference number code. Smarter Opening Balance app will automatically populate the Bank Code from Bank Accounts. Copy values from Edit in Excel spreadsheet and paste into this spreadsheet.
Bank Name: Self explanatory. Smarter Opening Balance app will automatically populate the Bank Name from Bank Accounts. Copy values from Edit in Excel spreadsheet and paste into this spreadsheet
Currency Code: Select from drop down list for foreign currency. For local currency (example GBP), leave blank. If relevant currency codes are not found on this list, please reach out to your Microsoft Partner for further assistance.
Amount: This is the amount for the transaction in currency selected above.
Amount LCY: This is the amount in local currency. Where Amount column is in foreign currency, then fill in the local currency equivalent amount. Otherwise, where Amount column is in local currency, then fill in with the same amount.
05A-Bank Transactions

This worksheet is for any historical or unreconciled transactions per bank account. Insert minus (-) sign for credit amount.
Posting Date: Transaction date posted in previous system.
Document Type: This is Optional and can be left blank. Alternatively, fill in Payment or Refund.
Document No: This is a free text field up to a maximum of 20 characters. This can be user defined or from previous systems.
Ext Document No: This is a free text field up to a maximum of 30 characters. This can be user defined or from previous systems.
Description: This is a free text field up to a maximum of 80 characters. This can be user defined or from previous systems.
Currency Code: Select from drop down list for foreign currency. For local currency (example GBP), leave blank. If relevant currency codes are not found on this list, please reach out to your Microsoft Partner for further assistance.
Amount: This is the amount for the transaction in currency selected above.
Amount LCY: This is the amount in local currency. Where Amount column is in foreign currency, then fill in the local currency equivalent amount. Otherwise, where Amount column is in local currency, then fill in with the same amount.
06 – VAT OB
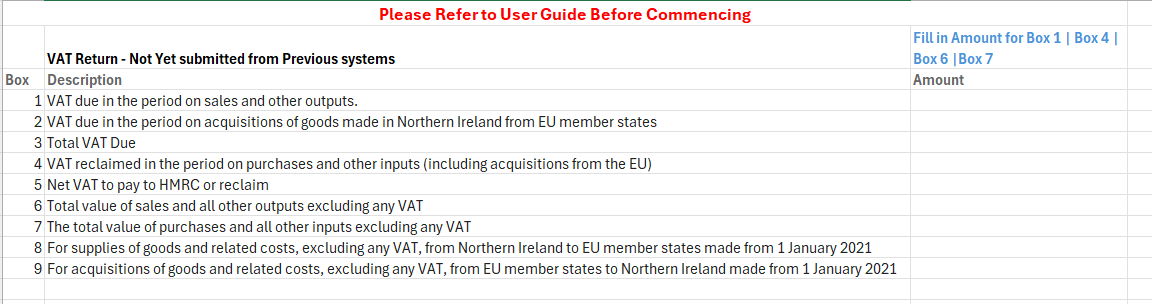
Use this only if there is a VAT Return to be submitted from Business Central at opening balance date.
Get your outstanding VAT figures from legacy system and populate into Box 1 | Box 4 | Box 6 and Box 7 only.
Box 6 and Box 7 figures must be greater than Box 1 and Box 4 respectively.
Amount must be in LCY only
07 Fixed Assets OB

FA No: Business Central fixed asset reference number code. Smarter Opening Balance app will automatically populate the Fixed Asset No from Fixed Assets. Copy values from Edit in Excel spreadsheet and paste into this spreadsheet
FA Name: Self explanatory. Smarter Opening Balance app will automatically populate the Fixed Asset Name from Fixed Assets. Copy values from Edit in Excel spreadsheet and paste into this spreadsheet
Acquisition Cost Date: This is a date field for when the fixed asset was first acquired. Note that the date format must be YYYY/MM/DD when using Edit in Excel.
Acquisition Cost Amount: LCY Amount for when the fixed asset was first acquired
Depreciation Posting Date: This is a date field for when the fixed asset was first depreciated. Note that the date format must be YYYY/MM/DD when using Edit in Excel
Accumulated Depreciation Amount: LCY Amount from legacy system for the fixed asset
Salvage (Residual) Value: LCY Amount for residual value – only for straight line depreciation method. This is an optional field
Net Book Value: This is to be left blank as Smarter Opening Balance app will automatically calculate the value.
08 GL Transactions

This worksheet is for any historical transactions for GL account(s).
Insert minus (-) sign for credit amount.
Entry No: This is a running number from 1. Simply drag down to last row and this will autopopulate running numbers. This is to be used when using Edit in Excel mode.
Posting Date: Transaction date posted in previous system. Note that date format must be in YYYY/MM/DD when using Edit in Excel.
Account No: This is the GL Account number from Business Central
Document Type: This is Optional and can be left blank. Alternatively, fill in from drop down list.
Document No: This is a free text field up to a maximum of 20 characters. This can be user defined or from previous systems.
Ext Document No: This is a free text field up to a maximum of 30 characters. This can be user defined or from previous systems.
Description: This is a free text field up to a maximum of 80 characters. This can be user defined or from previous systems.
Currency Code: Select from drop down list for foreign currency. For local currency (example GBP), leave blank. If relevant currency codes are not found on this list, please reach out to your Microsoft Partner for further assistance.
Amount: This is the amount for the transaction in currency selected above.
Amount LCY: This is the amount in local currency. Where Amount column is in foreign currency, then fill in the local currency equivalent amount. Otherwise, where Amount column is in local currency, then fill in with the same amount.
Global Dimension 1: This is optional and to be filled in accordingly if Global Dimension 1 is setup and defined with Dimension values
Global Dimension 2: This is optional and to be filled in accordingly if Global Dimension 2 is setup and defined with Dimension values
Shortcut Dimensions: These are optional and to be filled in accordingly if Shortcut Dimension(s) are setup and defined with Dimension values. Add in more Shortcut Dimensions columns if there are more than what has been provided on spreadsheet.
Business Central
Smarter Opening Balances
This section guides through the use of Smarter Opening Balances app in Business Central.
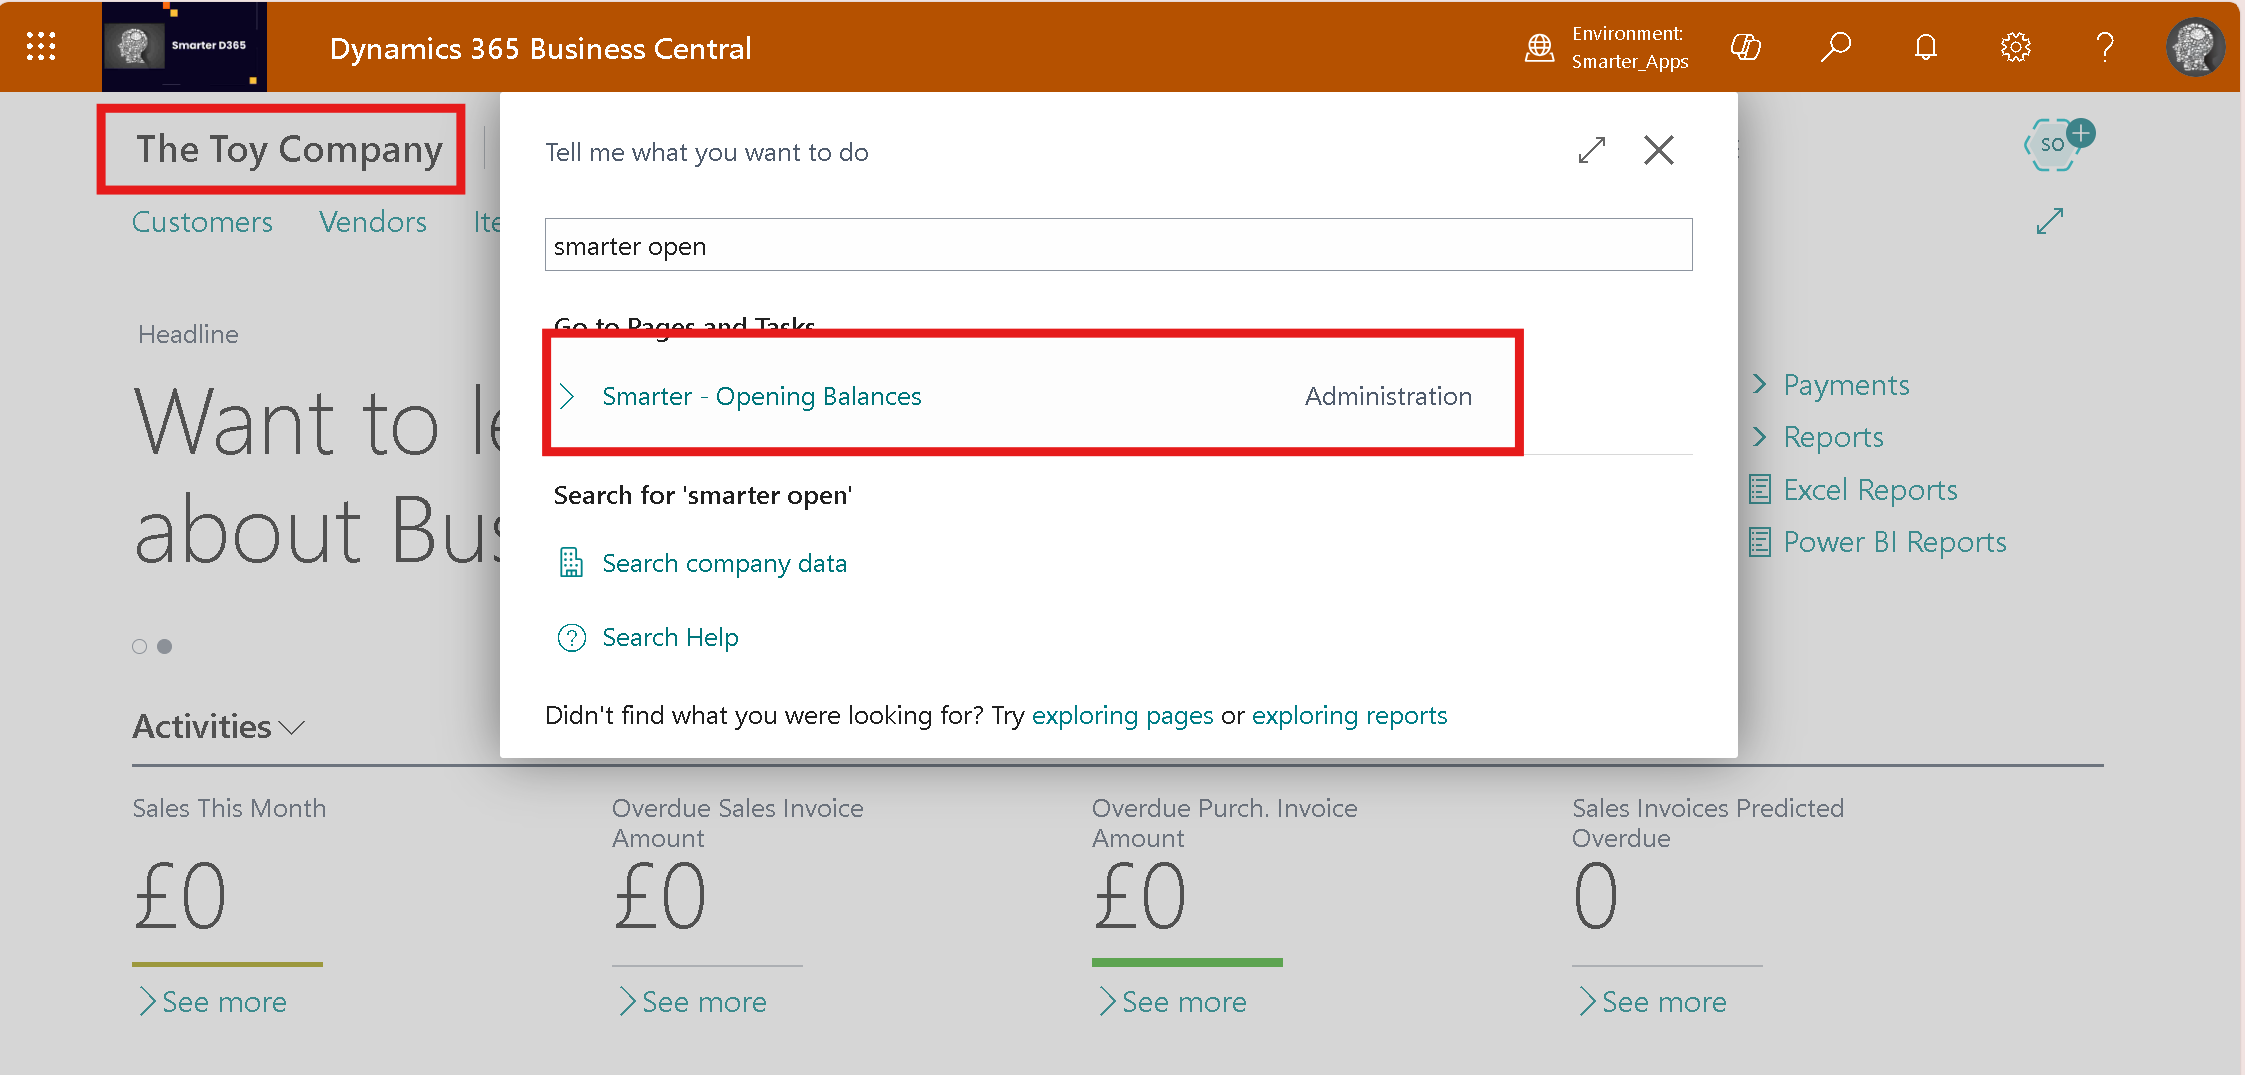
Make sure you are in the correct company in Business Central.
Search and select Smarter Opening Balances
App Registration
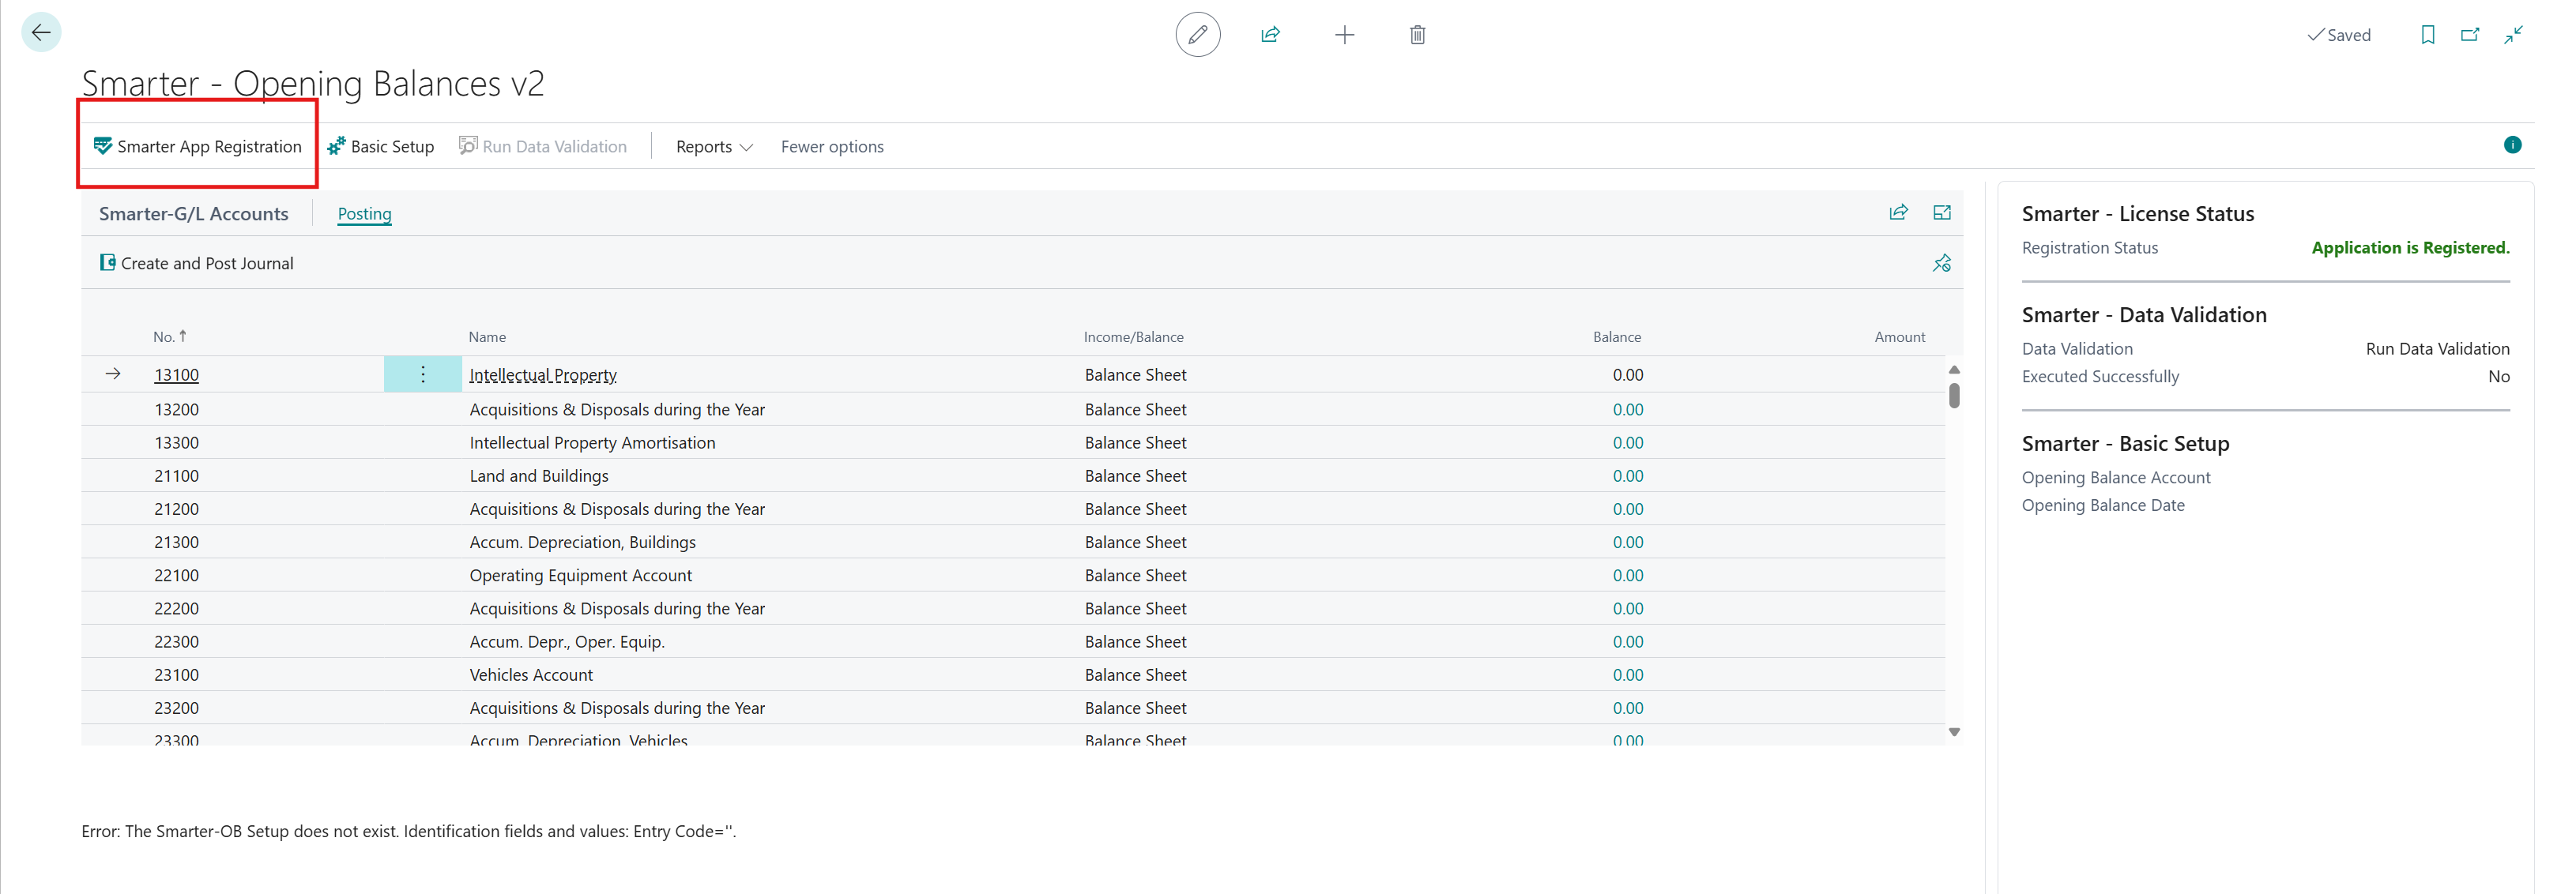
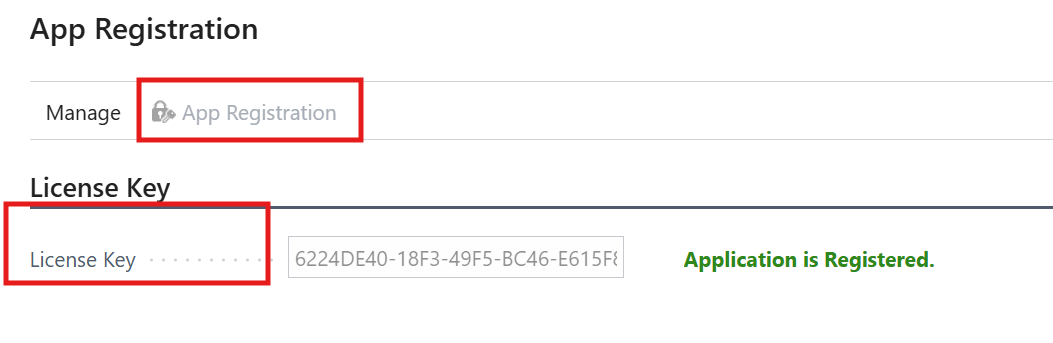
Register the App. Click on Smarter App Registration and the following page will pop up: Fill in the License Key and select App Registration. This will change to show Application is Registered.
Basic Setup
Once Registered, select Basic Setup
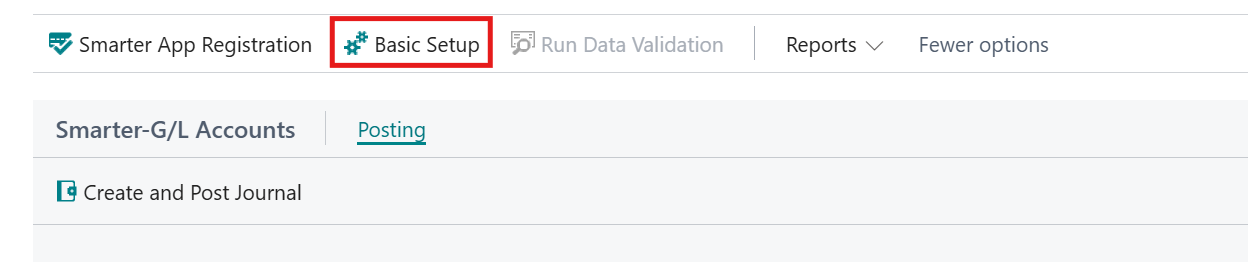
A new page will open

Opening Balancing Account: When subledger balances are brought in, the balancing side is posted to this account. Create a new balancing Balance Sheet GL account.
Transaction Date for opening balances: This is the opening balance date.
Note: This is not the Financial/Fiscal start date.
Run Validation
On the factbox, click on Run Data Validation.

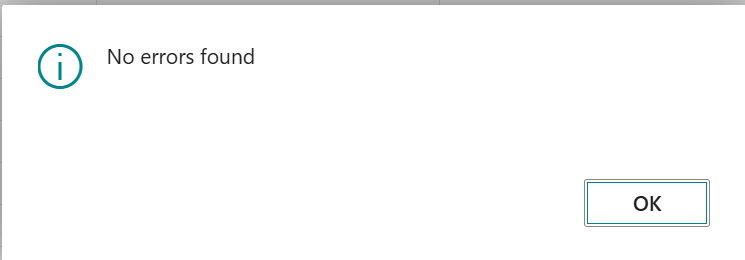
Message should show No errors found. If there are error or warning messages, please fix any errors and heed warnings. Please get in touch with admin@smarterd365.co.uk if further assistance is required.
Once Validated, this will show:

General
Recommendation
We recommend using Smarter Opening Balances app in a sandbox environment before using in production environment.
It is best practice to review data and reconcile GL accounts totals against legacy (previous) systems trial balance before deploying to a production environment.
Cue Colour
Cues will show the following colours:
Red = Differences between subledger journals and GL Accounts
Amber = No differences found. Journals not posted
Green = Journals posted
Conditions
Once a cue is posted, there is no longer the opportunity to post again. Either leave all postings to last and only post when customer has confirmed or create a new company and go through Smarter Opening Balances steps again.
Posted Cues
When a cue that is green is selected, this will open the posted entries for review.
Opening Balance from Legacy Systems
Using the front page, start filling in the Amount column that has been extracted from your legacy system Closing Balance Trial Balance.
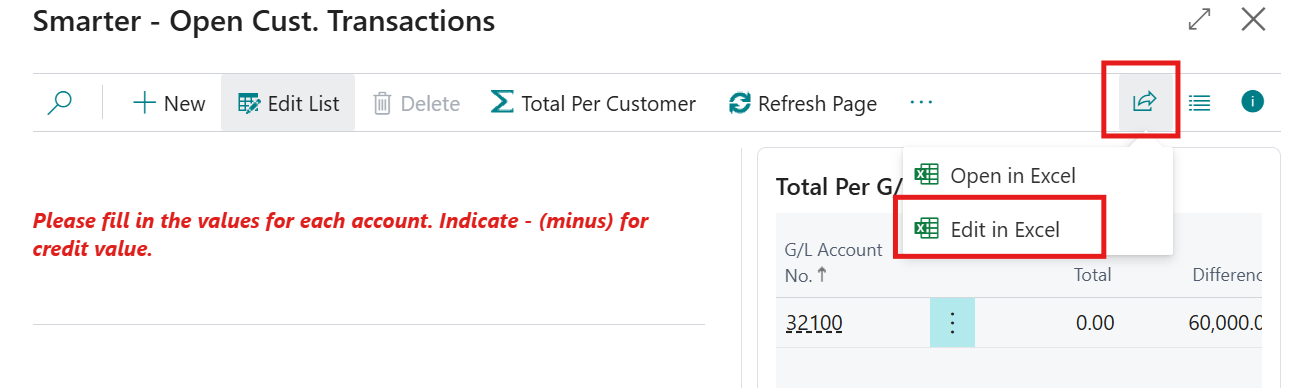
Optionally, export to excel
Select  icon and select Edit in Excel.
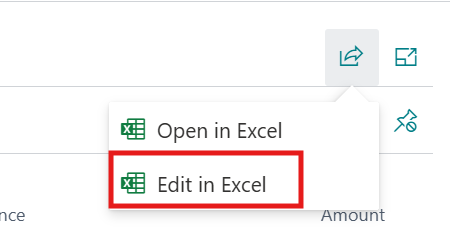
This will download to Excel. Open the file
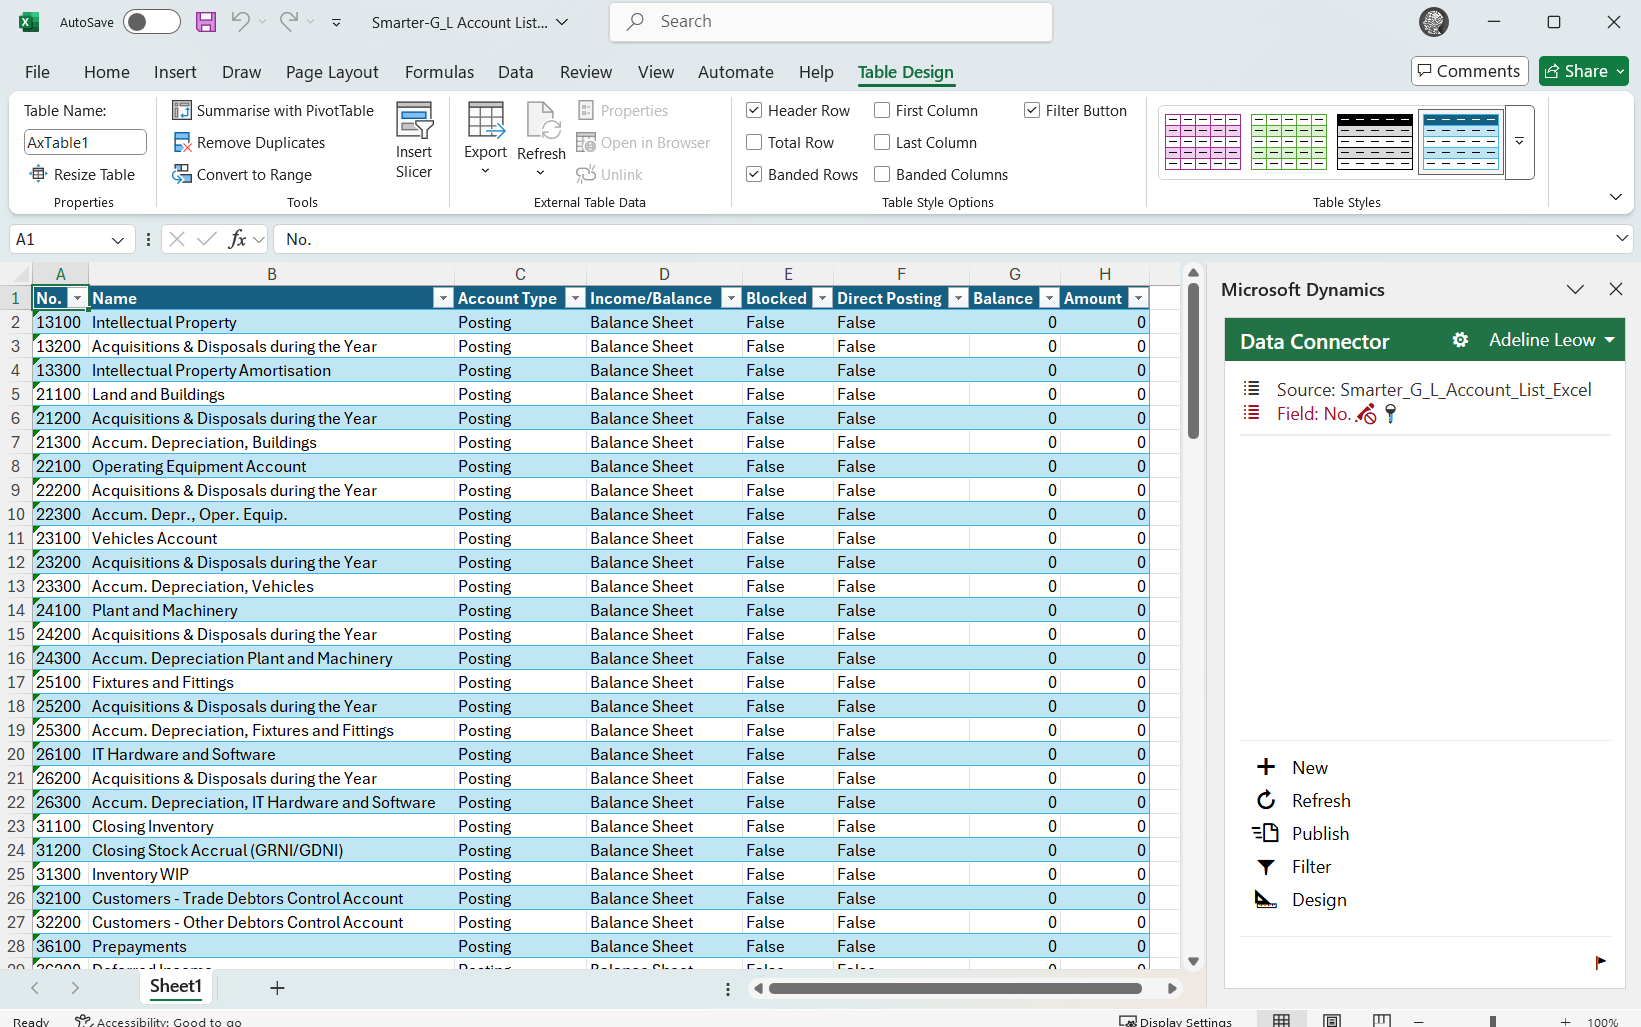
Select Enable Editing

Login to the Data Connector on the right hand pane.

This will auto populate with data from Business Central
Fill in the Amount column – column H (TB Closing Balance from Legacy system). Note: Credit amount is represented by a minus (-). Click on Publish when all Amounts have been filled in. This will import into Business Central
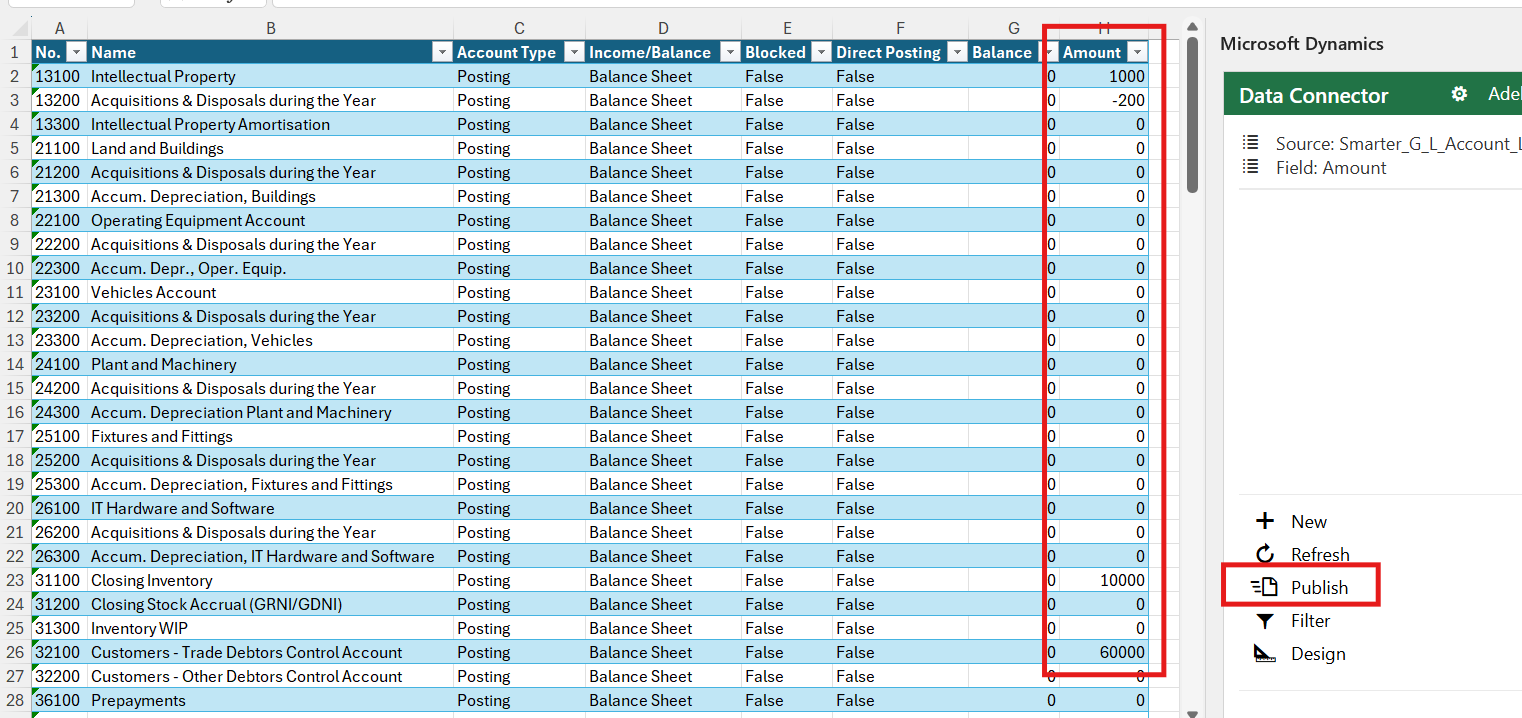
Return back to Business Central. Select Functions – Refresh List and this will update with published figures from Excel.

Subledger Balances
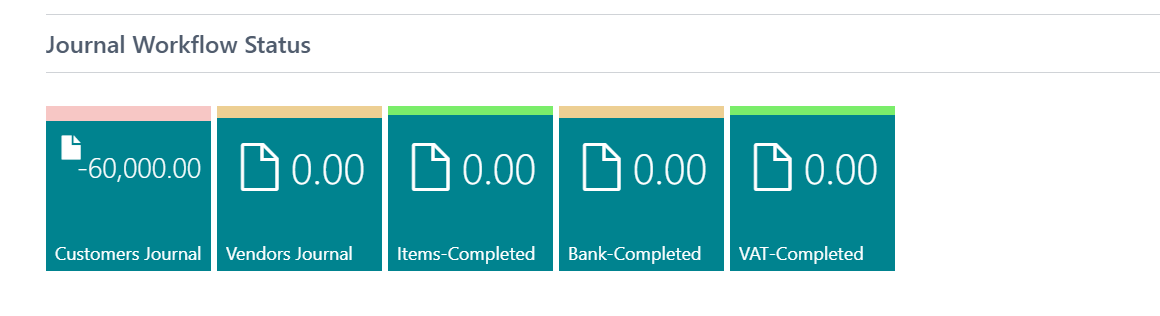
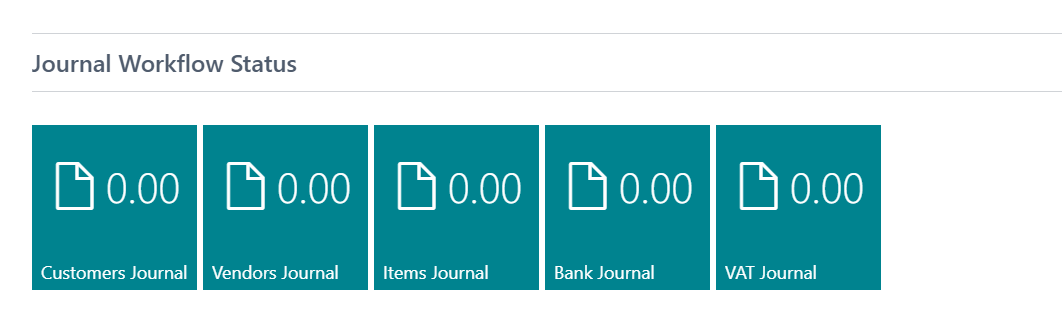
At the bottom of the page, there are cues for uploading/inputting subledger opening balances.
Customer Journal
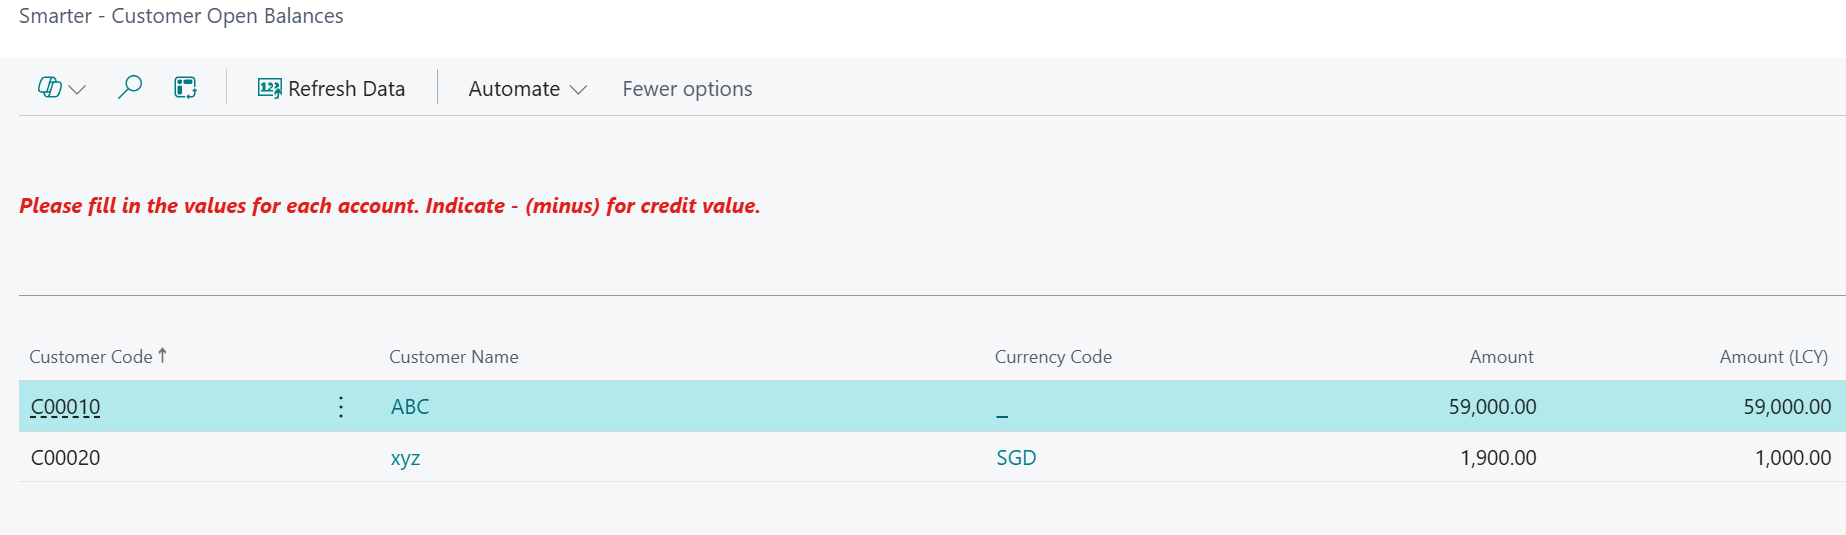
Select Customer Journal cue and this will pop out a new page:
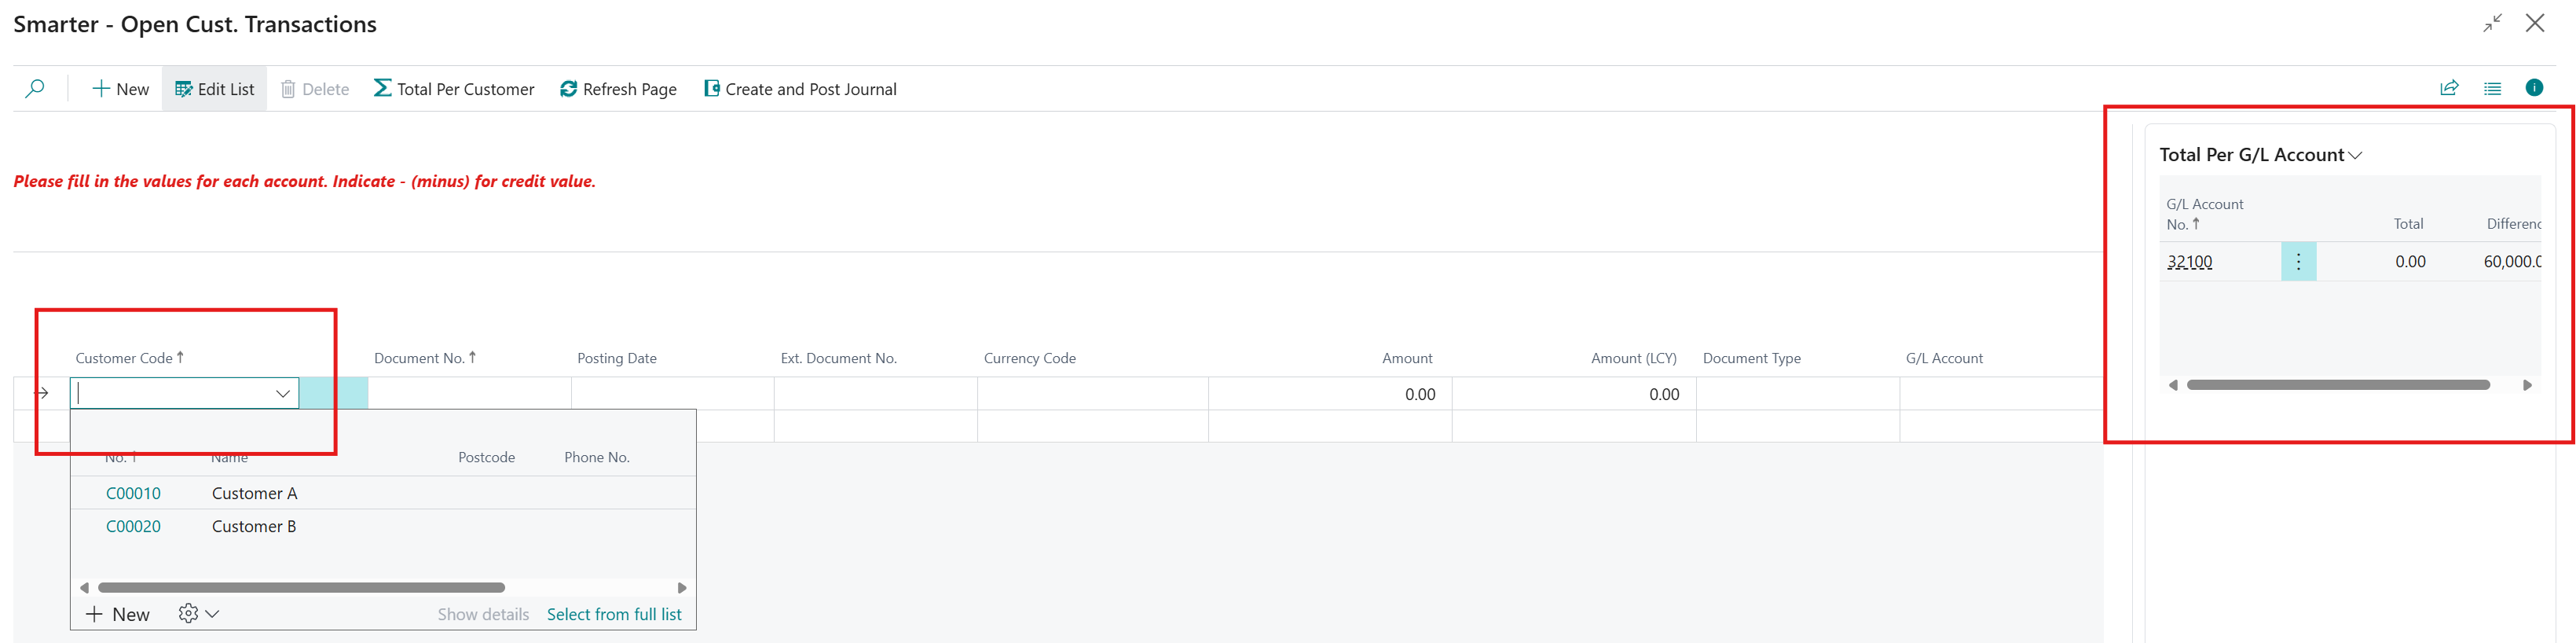
Start inputting each customer historical and open invoices, credit memos, payments or refunds from legacy systems.
Note: Minus (-) value represents credit memos and payments.
Fill in the document type from the drop down list. This is optional and can be left blank.
Once all lines are filled in, the system will check the total balance here to the GL Account.
Example: In this example, The total in this page does not match the total balance against the GL Account.
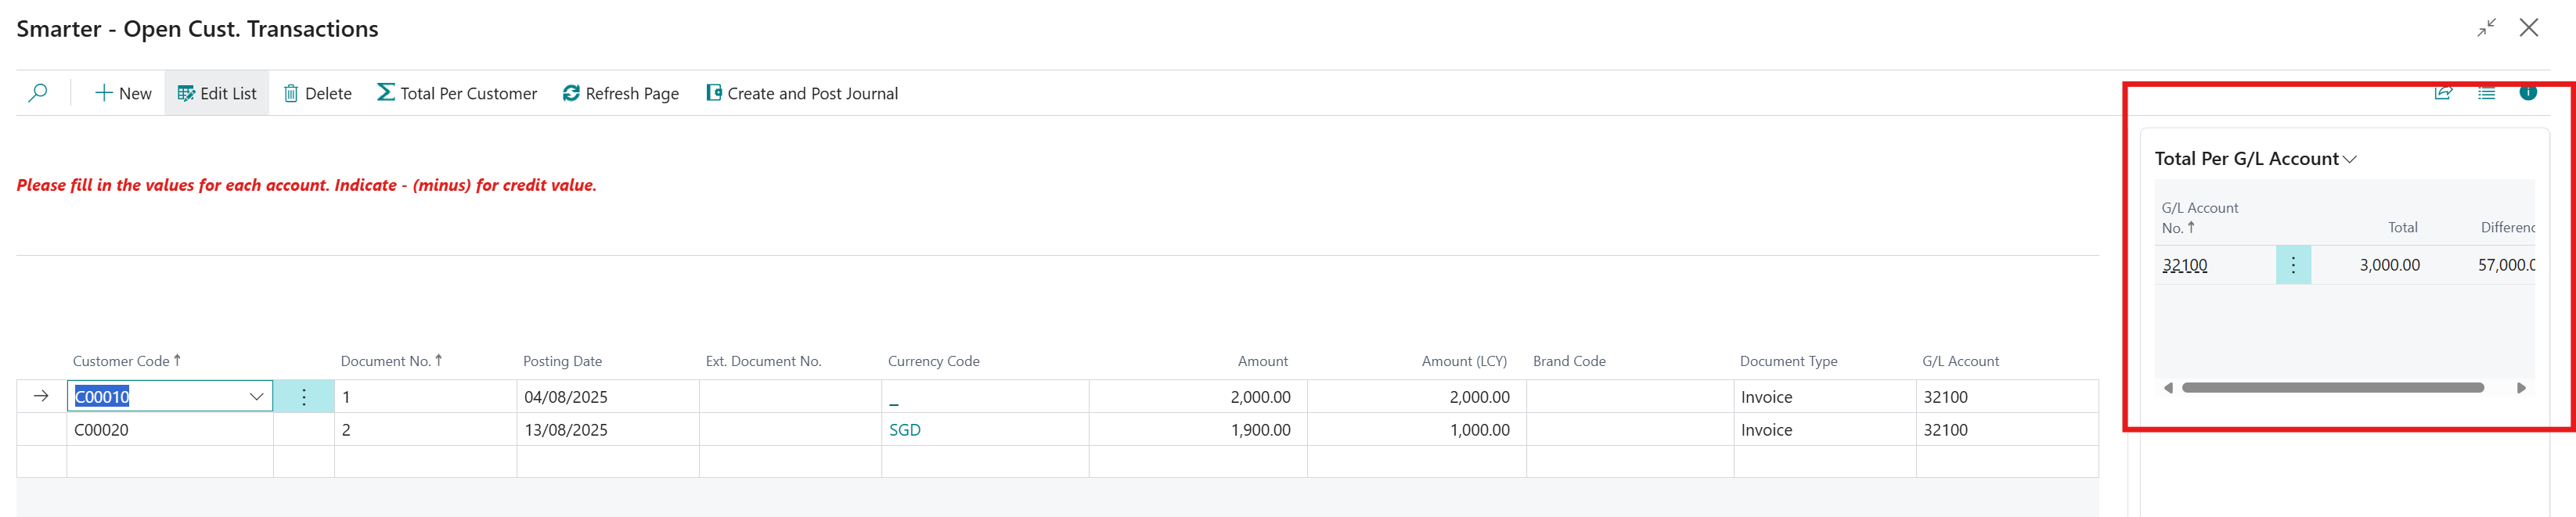
Make sure all invoices and credit memo per customer in total matches the GL Account total.
Note: If Dimensions are enabled, the Dimensions will appear and Dimension values can be utilised here.
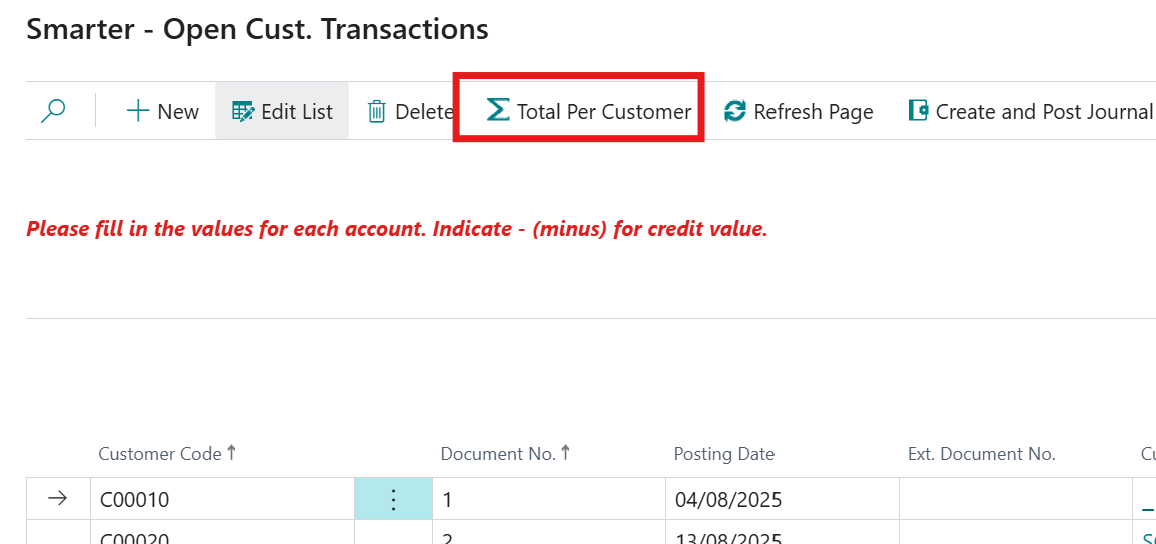
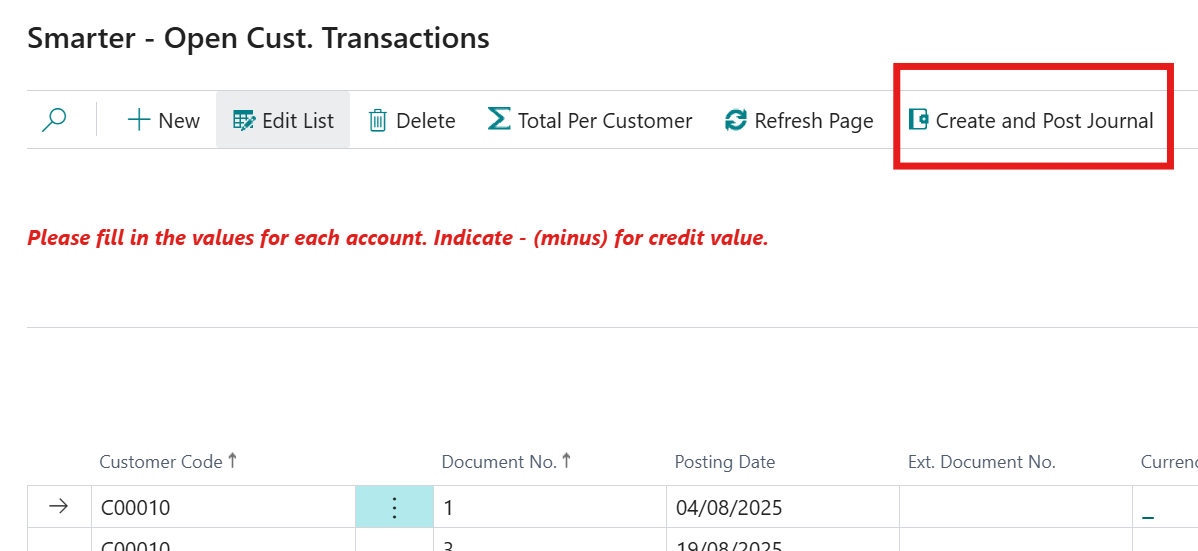
Optionally – you can check totals by customer by selecting Total per Customer
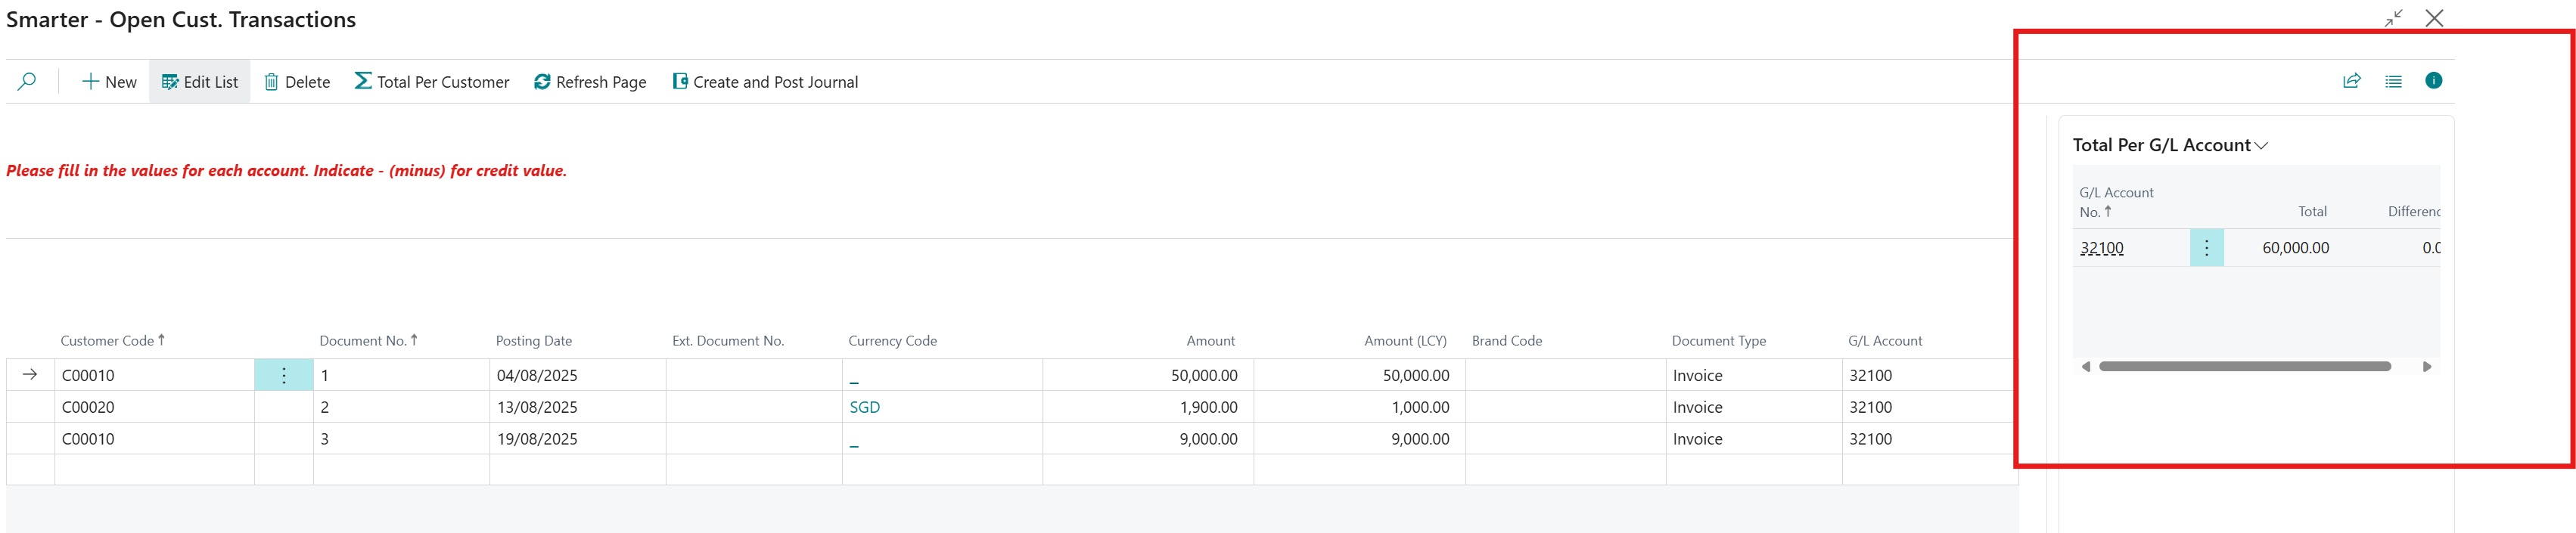
Once there are no differences, select Create and Post Journal
Optionally export to excel and follow steps above.
Note: Any transactions that require applications (matching) because they are no longer open will require manual retrospective application through Customer Ledger Entries table.
Vendor Journal
The steps here are the same as Customer Journals. The only difference is the signage where minus (-) represents invoice and refunds instead.
Note: Any transactions that require applications (matching) because they are no longer open will require manual retrospective application through Vendor Ledger Entries table.
Item Journal
Select Item journal cue and click on Edit list.

The list here shows all items created.
Start filling in (optionally export to excel) items. Fill in appropriate locations and/or bins where these have been enabled and set up.

Once there are no differences, create and post journals.
Bank Journal
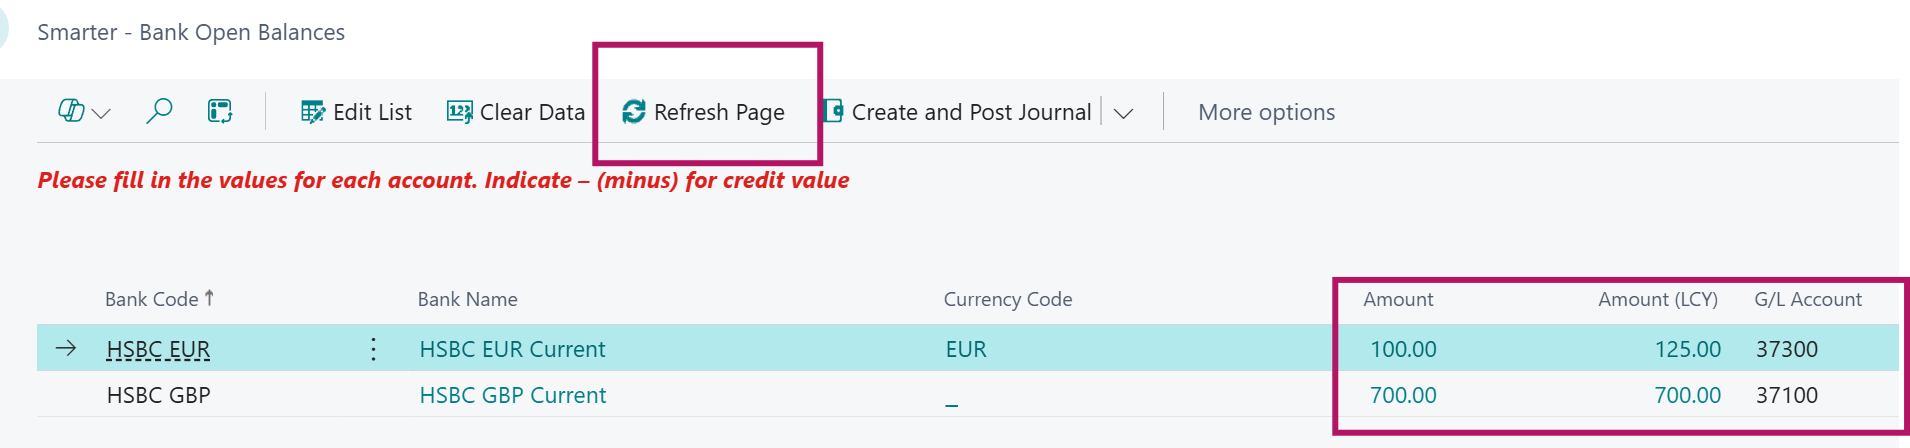
Select Bank journal cue and click on Edit list.

Highlight Bank Account and select 0.00 under Amount column. This will show a new page:

Note: if the bank account is in a foreign currency, fill in Amount in foreign currency and amend the Amount (LCY) figure to its corresponding local currency amount that is from your legacy system.
Fill in (alternatively, use Edit in Excel) and copy and paste from 05A -Bank Transactions Worksheet

Start inputting each bank transaction payments or refunds from legacy systems.
Note: Minus (-) value represents credit.
Fill in the document type from the drop down list. This is optional and can be left blank.
Once all historical transactions are filled in per bank account, return to main Bank Opening Balances page and hit Refresh Page. This will now show each bank account totals from transactions uploaded.
Once there are no differences, create and post journals.

To close all reconciled posted bank ledger entries, on the main page, select Bank Completed cue and this will pop out a message. Select Navigate to Bank Ledger Entries
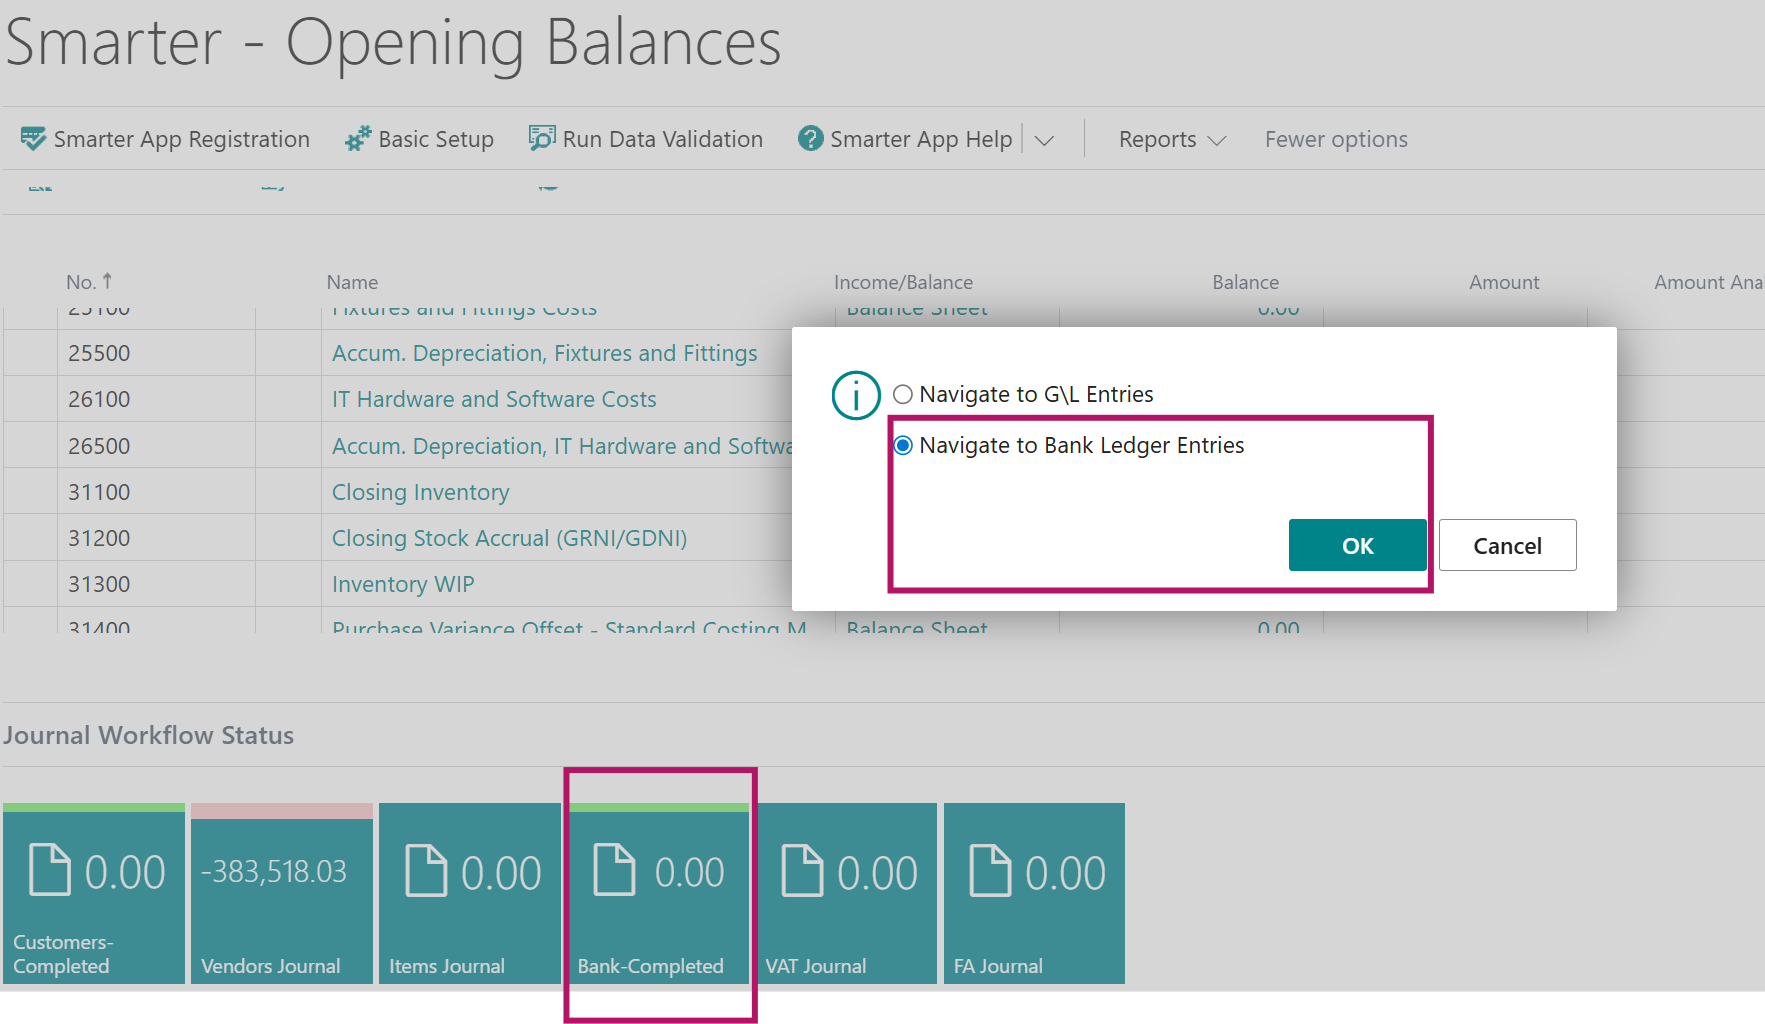
Simply untick any transactions that are already reconciled from legacy systems.

This will mean that when doing your first bank reconciliation in BC, you will only get unreconciled transactions to reconcile once bank statement is received.
VAT Journal
Select VAT journal cue.
Only enable this page when you have open VAT return to submit from Business Central.
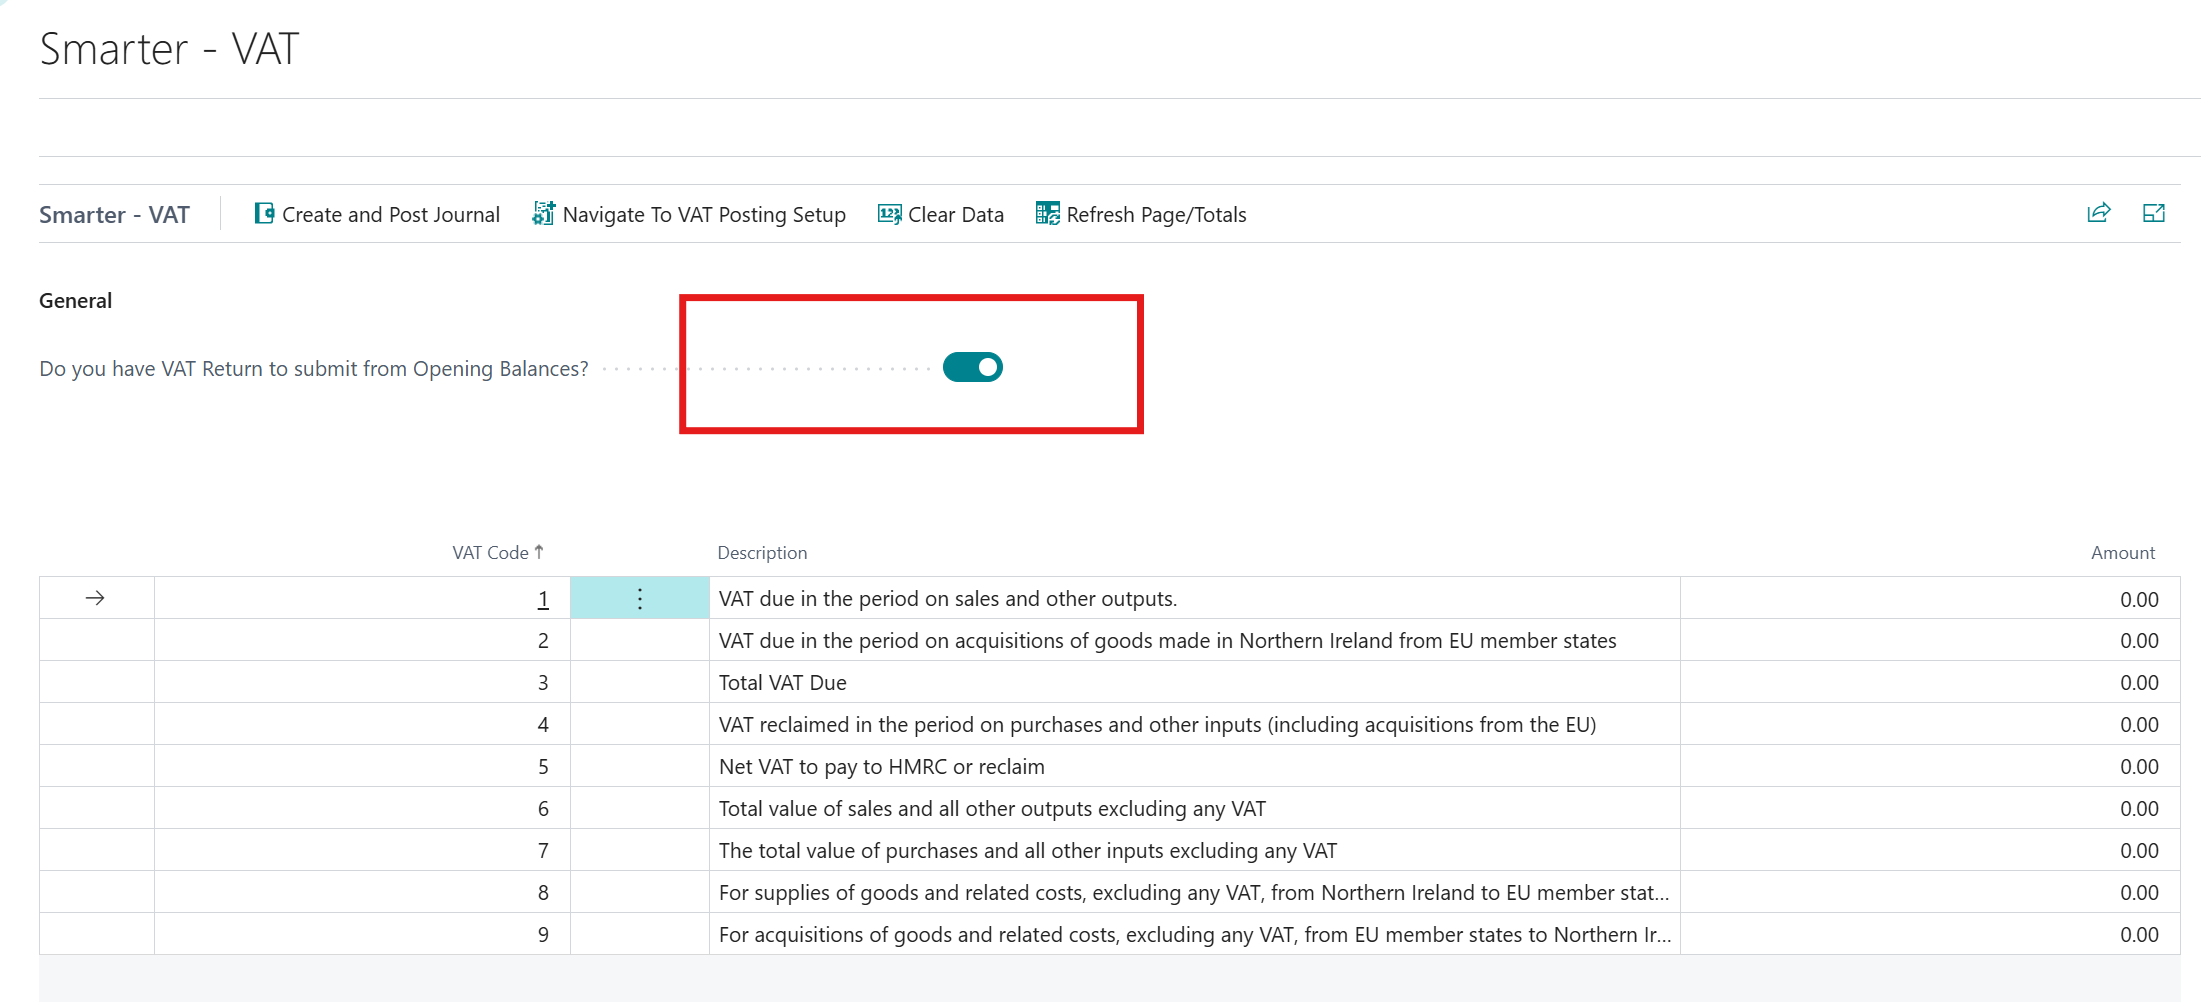
Once enabled, fill in the values as follows:
Box 1: This will be the VAT value found in Sales VAT account.
Box 4 - This will be the VAT value found in Purchase VAT account.
Box 6 - This will be the Net of VAT value for Sales
Box 7 - This will be the Net of VAT value for Purchases
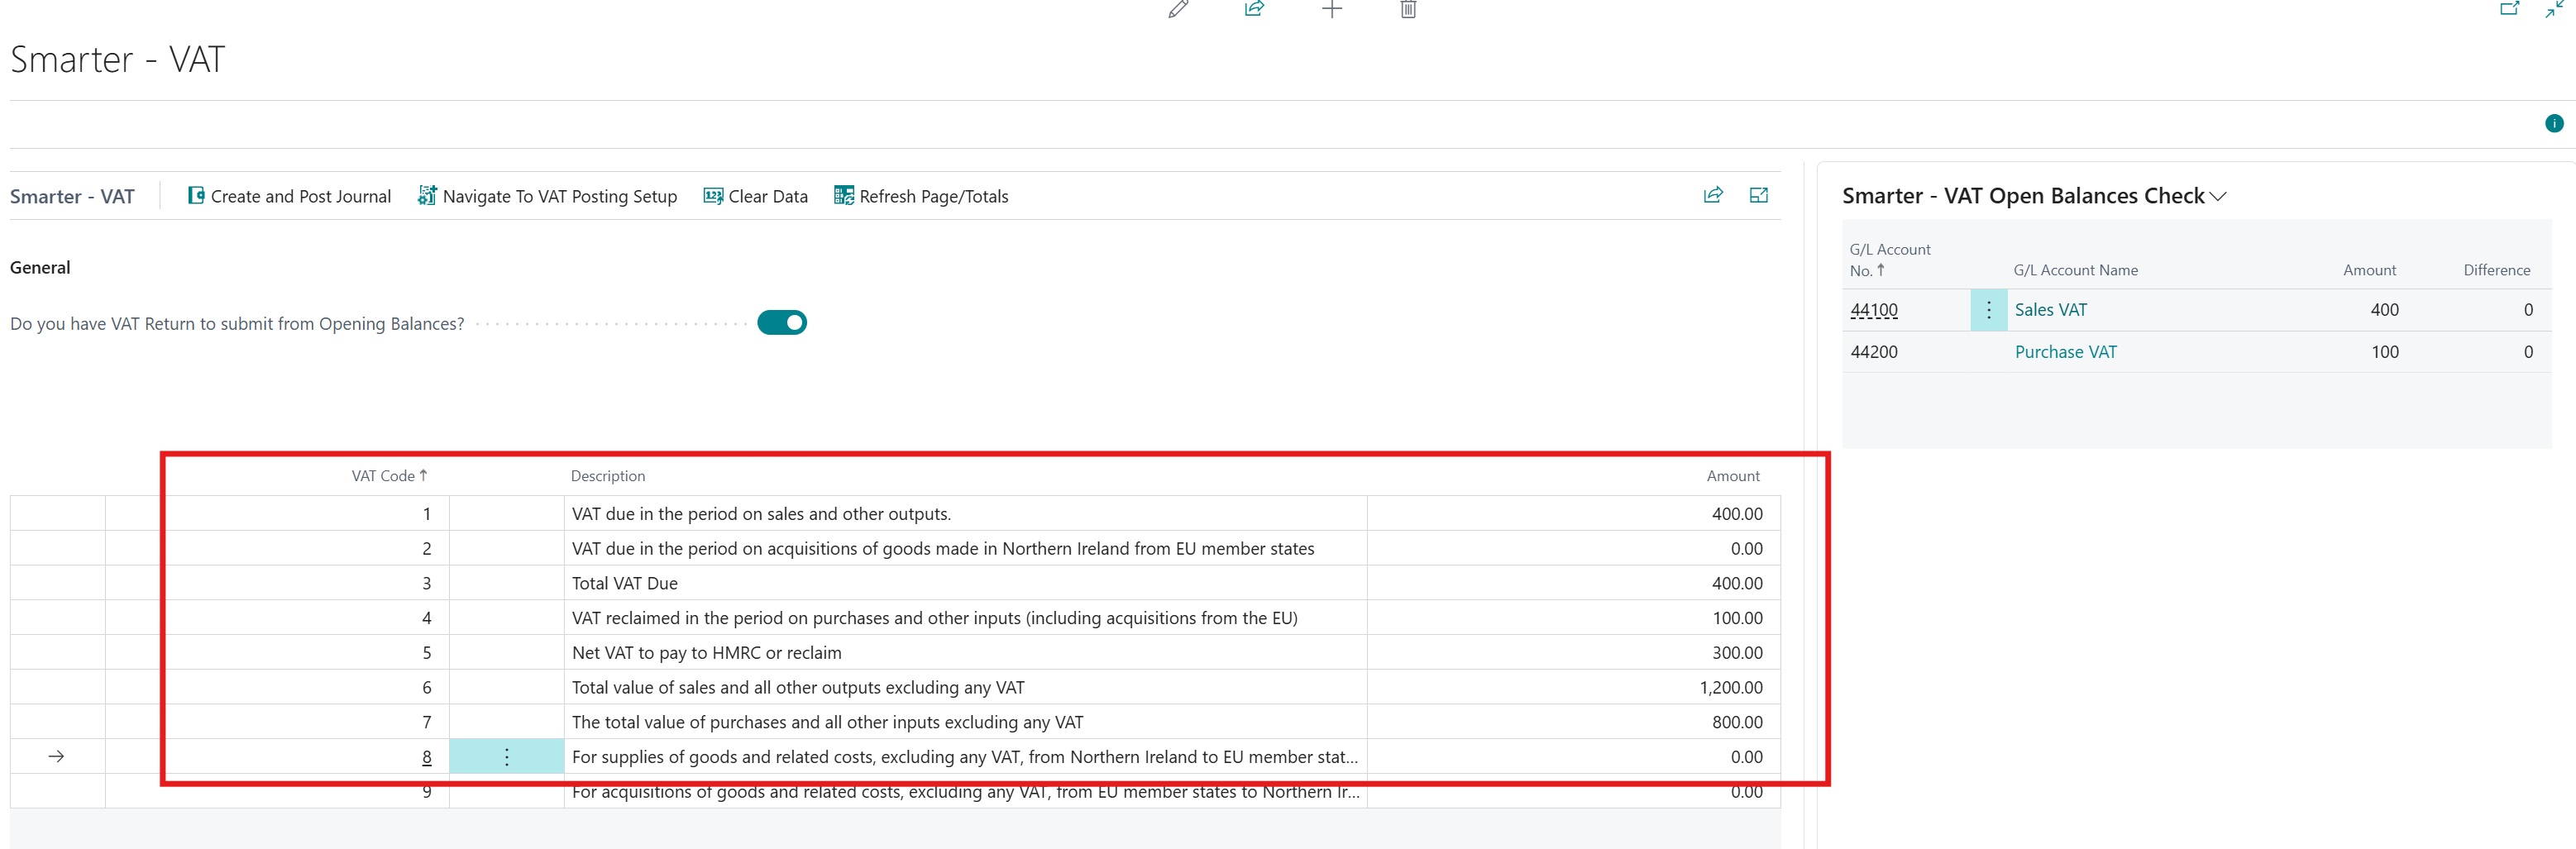
Once there are no differences, create and post journals.
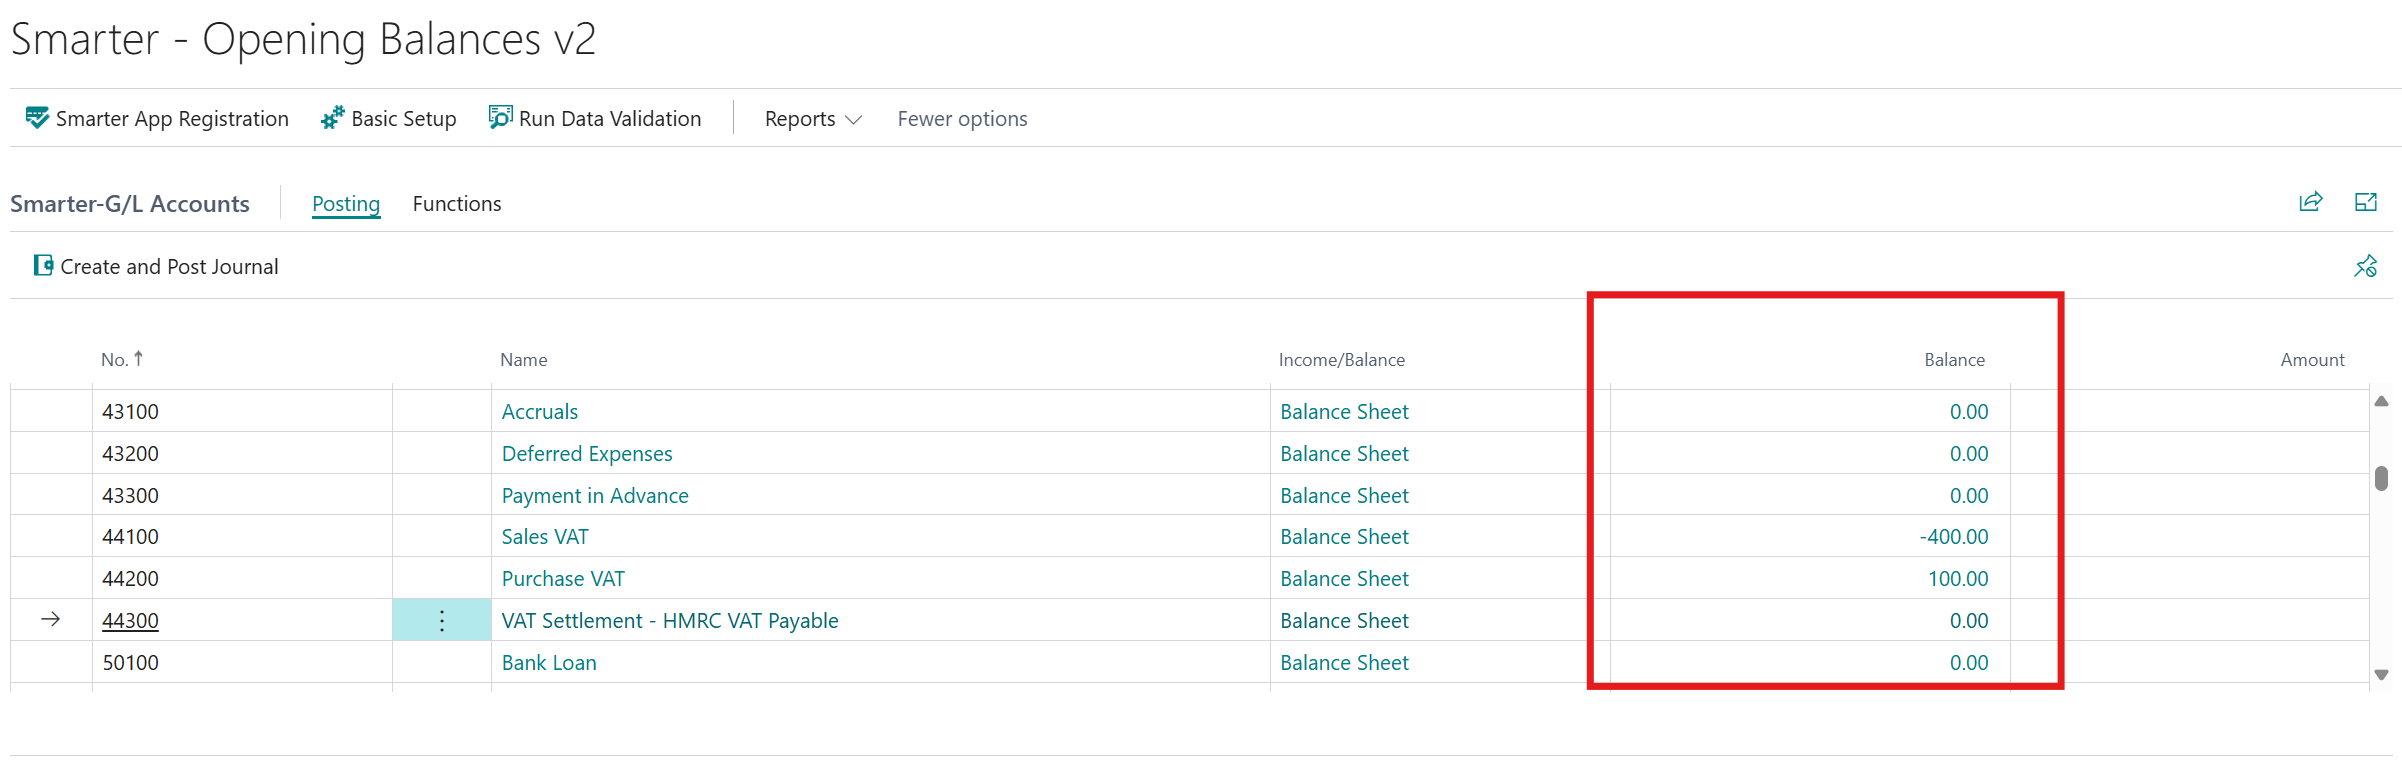
Smarter – Subledger Balances
Once all subledger journals have been posted, Amount for the relevant GL Accounts will disappear and will appear in Balance on Smarter Opening Balances main page.
Smarter – G/L Open Balances
The following details walk through steps on how to bring in historical transactions for GL Accounts that are not related to subledgers.
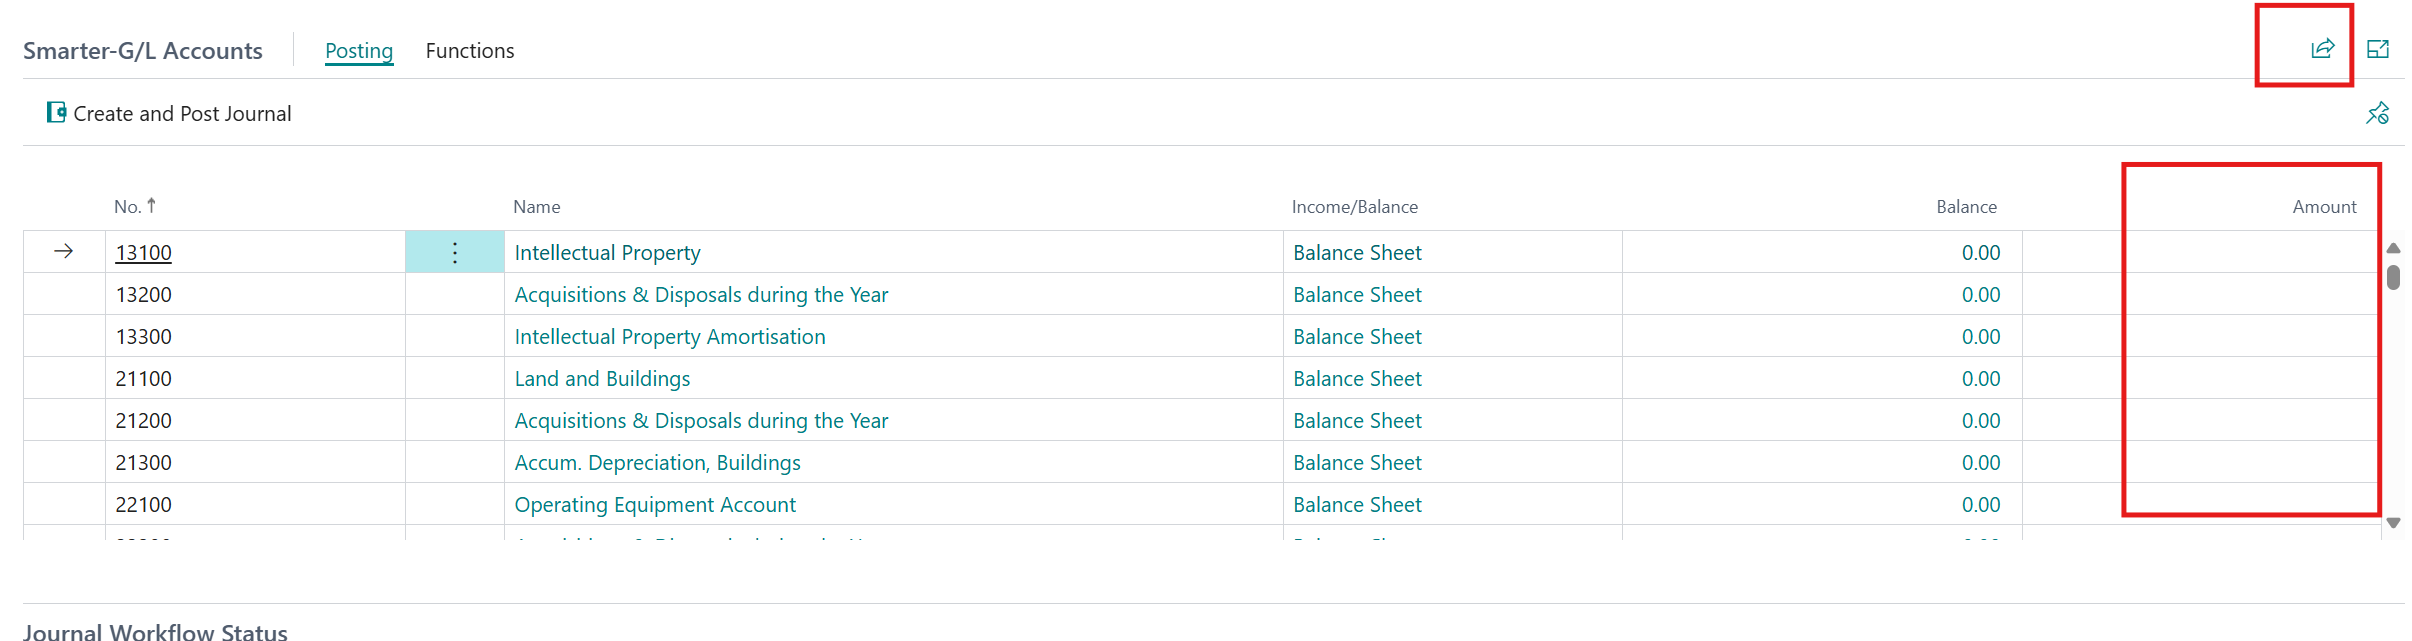
Select Functions – Batch load via Excel
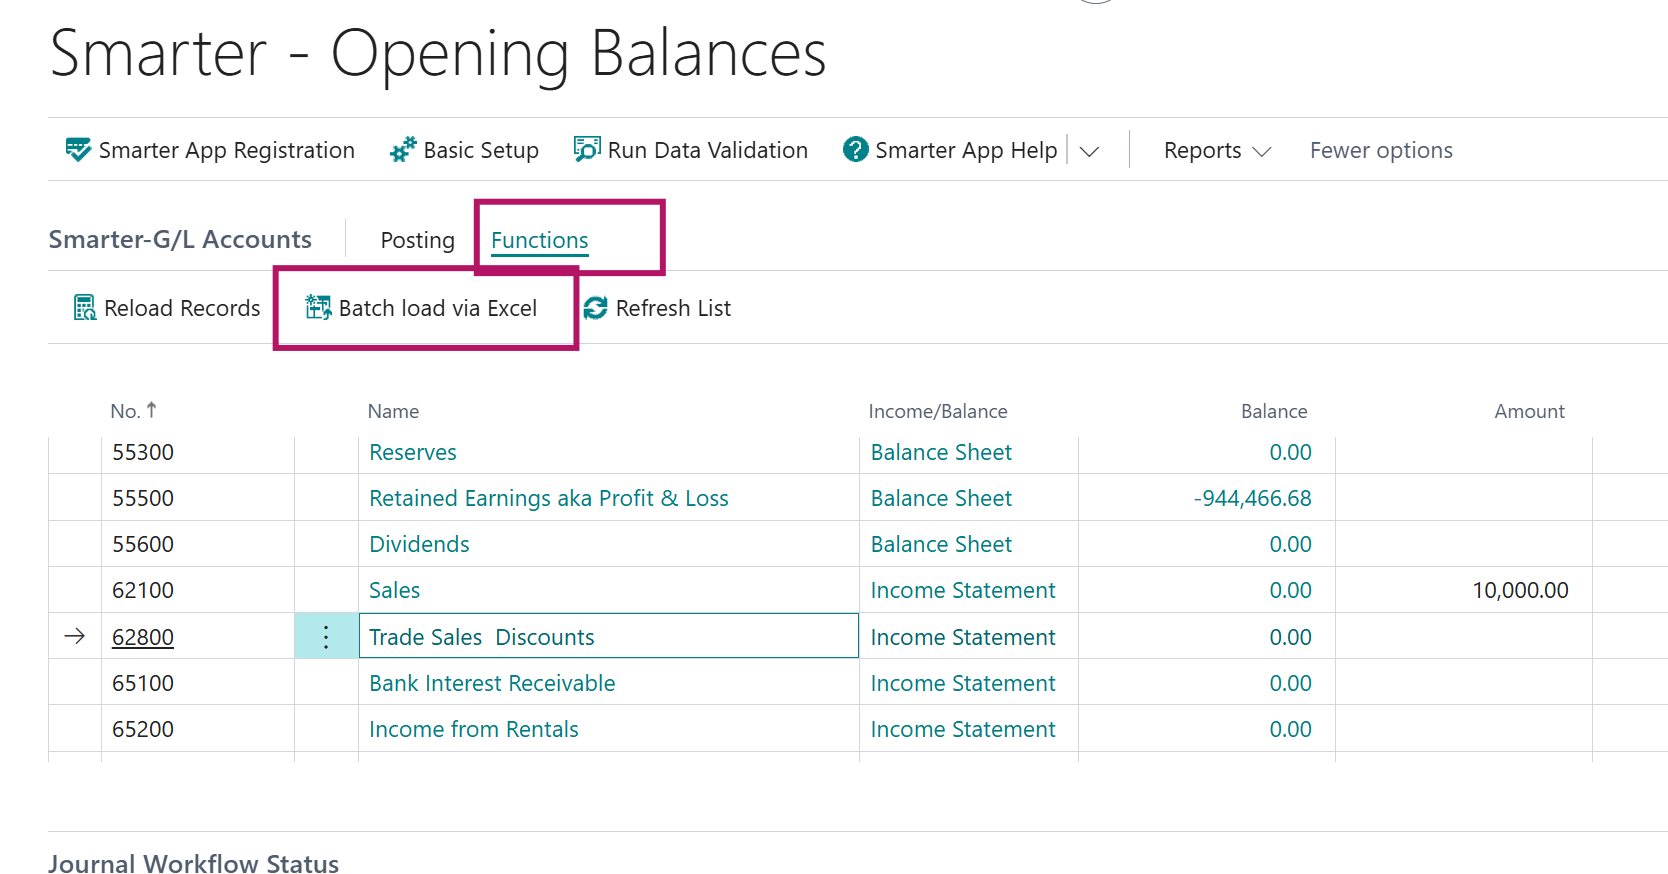
This opens a new page where you can either fill in manually or Edit in Excel – copy and paste from 08-GL Transactions Worksheet

Start inputting each historical transaction from legacy systems by GL Accounts
Note: Minus (-) value represents credit.
Fill in the document type from the drop down list. This is optional and can be left blank.
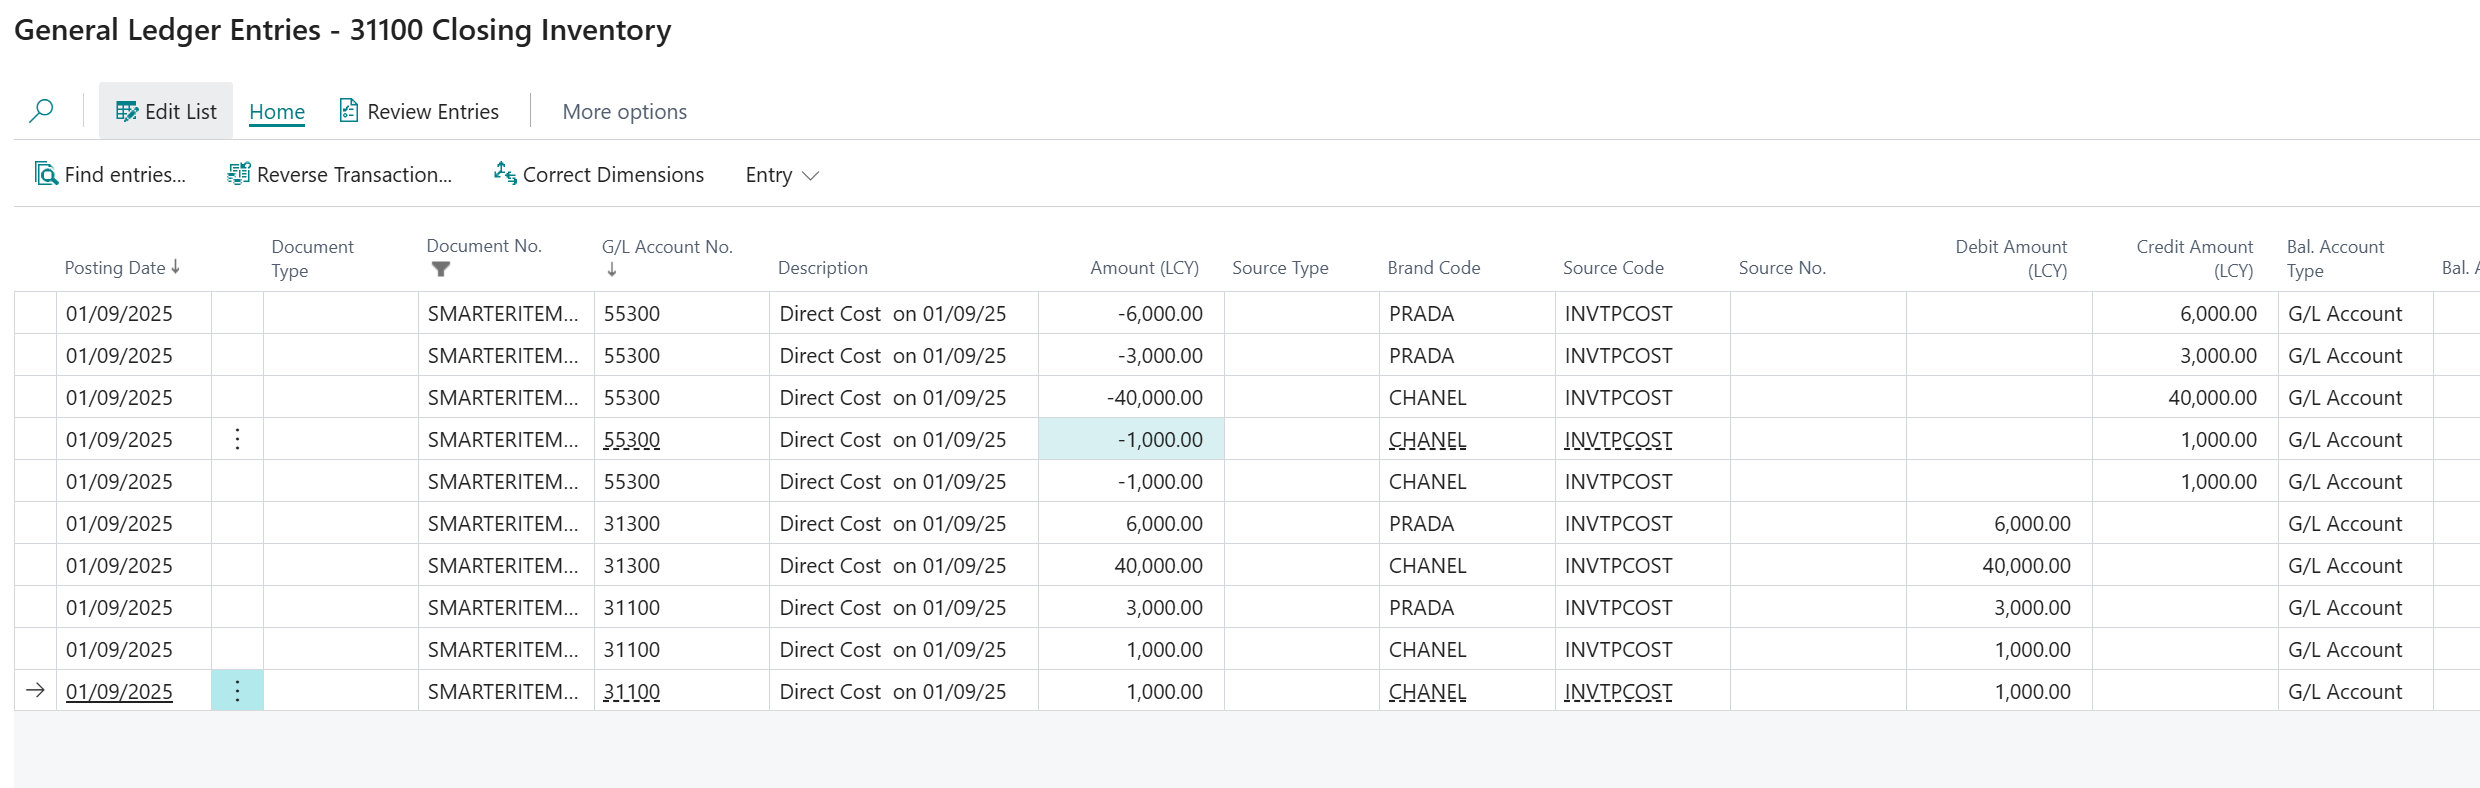
Once all lines are filled in, the system will check the total balance here to each GL Account and show in Amount Analysis.
Scroll down and make sure all Amounts equal to Amount Analysis. Resolve any difference before posting
Note: Where there are GL accounts that do NOT require transactions, there is no need to fill in transactions for these GL Accounts in 08-GL Transactions Worksheet 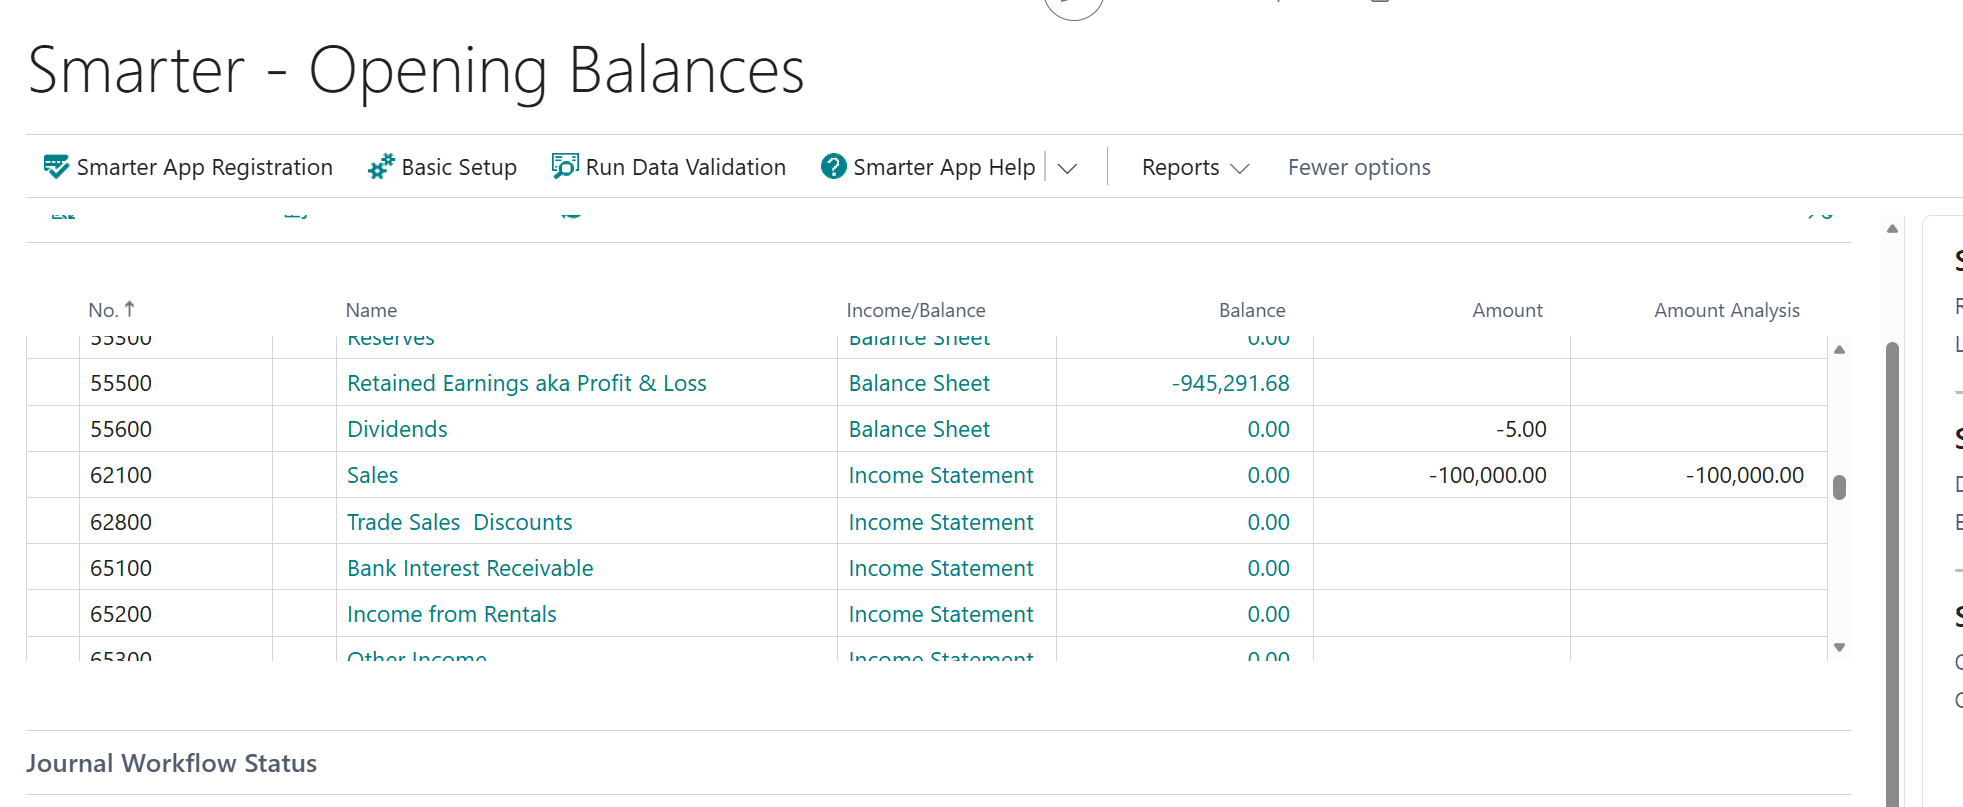
When ready to post GL transactions, select Create and Post Journal
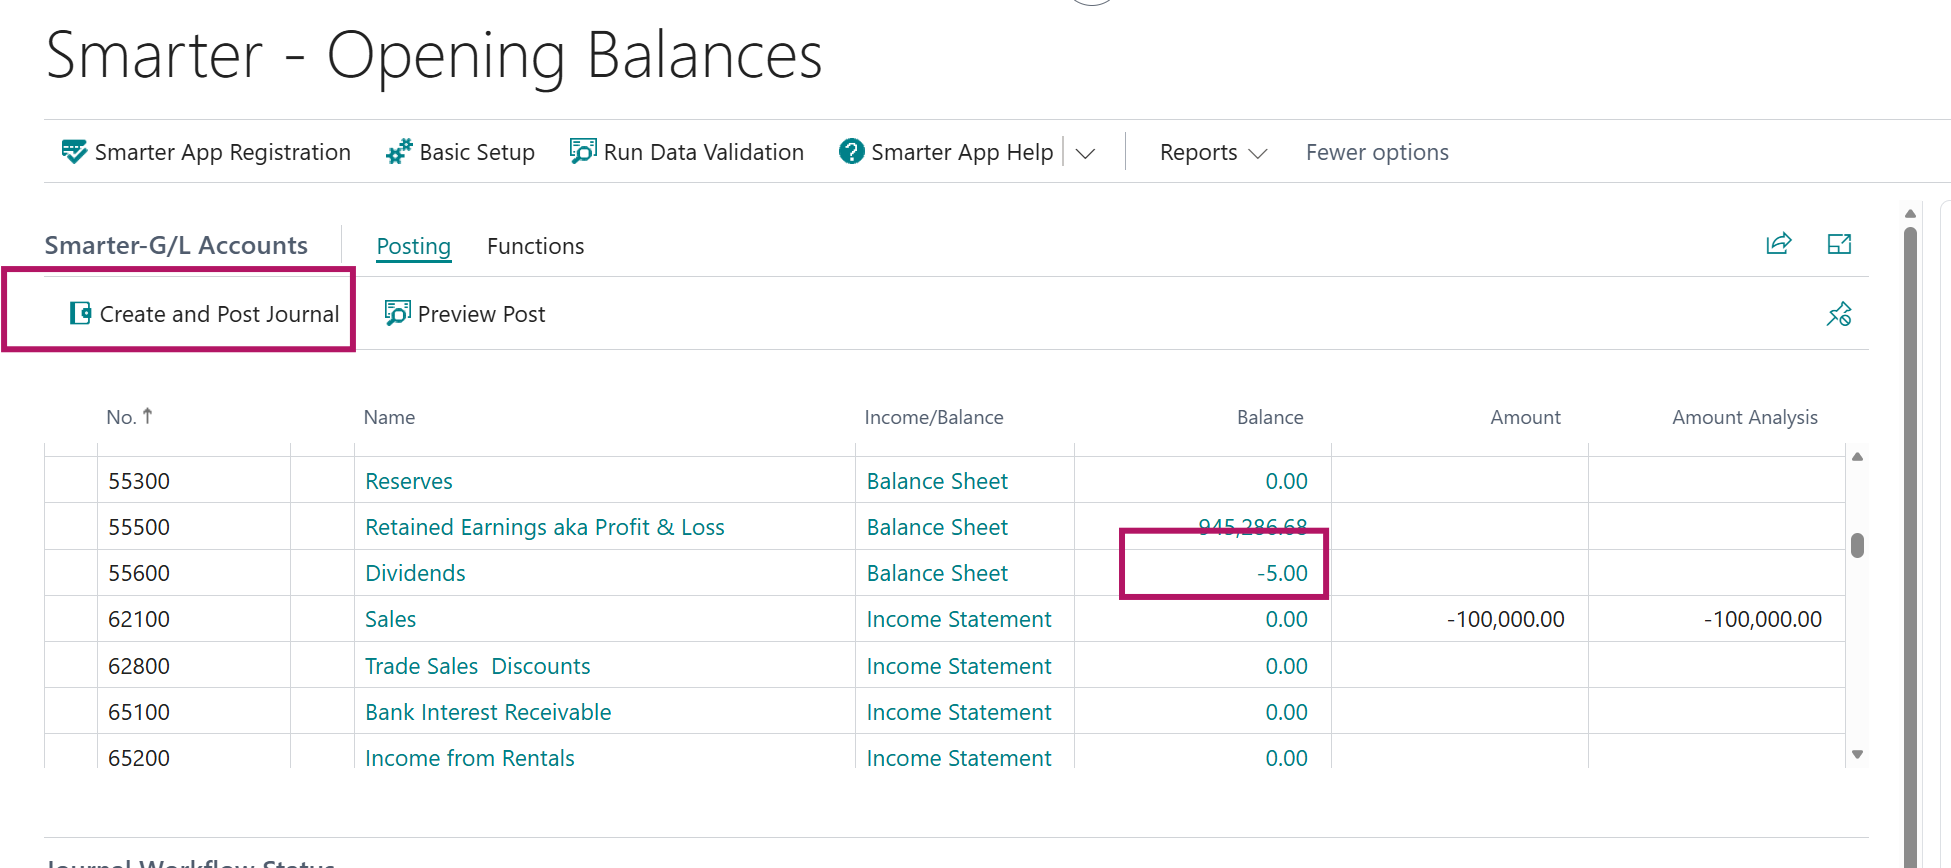
Once posted, amount will disappear and shown in Balance.
